GPSMAP 4000 Series Owner’s Manual 7
Using Charts
USinG
ChartS
Navigation Chart Settings
To access additional settings or options for the navigation chart, press MENU.
Waypoints & Tracks—view and add waypoints and tracks, and congure how they are displayed.
Other Vessels—view information about other vessels if your chartplotter is connected to an external
Automatic Identication System (AIS) or Digital Selective Calling (DSC) device.
Stop Navigation—stop navigating to your destination (only available while navigating).
Chart Setup—customize the Navigation chart settings (page 9).
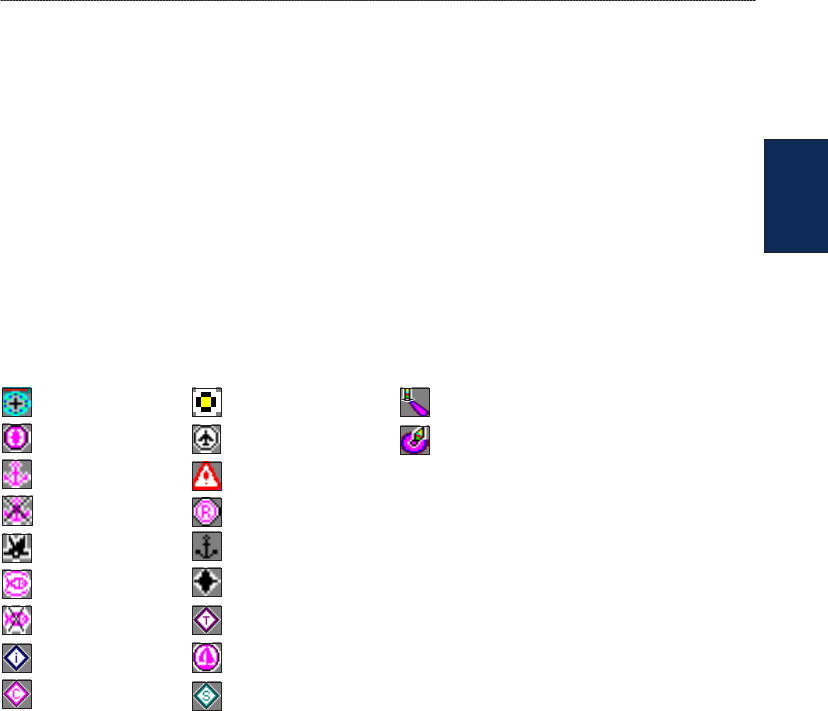
Understanding Chart Data
BlueChart g2 and BlueChart g2 Vision charts use graphic symbols to denote map features, which
follow the standards for US and international charts. Some common symbols you might see include,
but are not limited to, the following:*
Dangerous Rock Exposed Rock Beacon
Pilot Boarding Area Airport/Seaplane Base Buoy
Anchorage Berth Precautionary Area
Anchoring Prohibited Radio Report Point
Exposed Wreck Recommended Anchorage
Fishing Harbor Rescue Station
Fishing Prohibited Tide Station
Information Yacht Harbor
Current Station Marine Services
*Some symbols might appear differently on your Garmin device.
Other features common to most charts include depth contour lines (with deep water represented in
white), intertidal zones, spot soundings (as depicted on the original paper chart), navigational aids
and symbols, and obstructions and cable areas.
Navigating to a Point on the Chart
1. From the Home screen, select Charts.
2. Select Navigation Chart, Fishing Chart, or Radar Overlay.
3. Select the point on the chart to which you want to go.
4. Select Navigate To.
5. Select an option:
Select Go To.
Select Guide To when using a preprogrammed BlueChart g2 Vision card for automatic
guidance.
6. Follow the colored line on the screen to the destination.
To create a route to a point on the chart, see page 27.
•
•


