6.27
CLUTCH SYSTEM
6
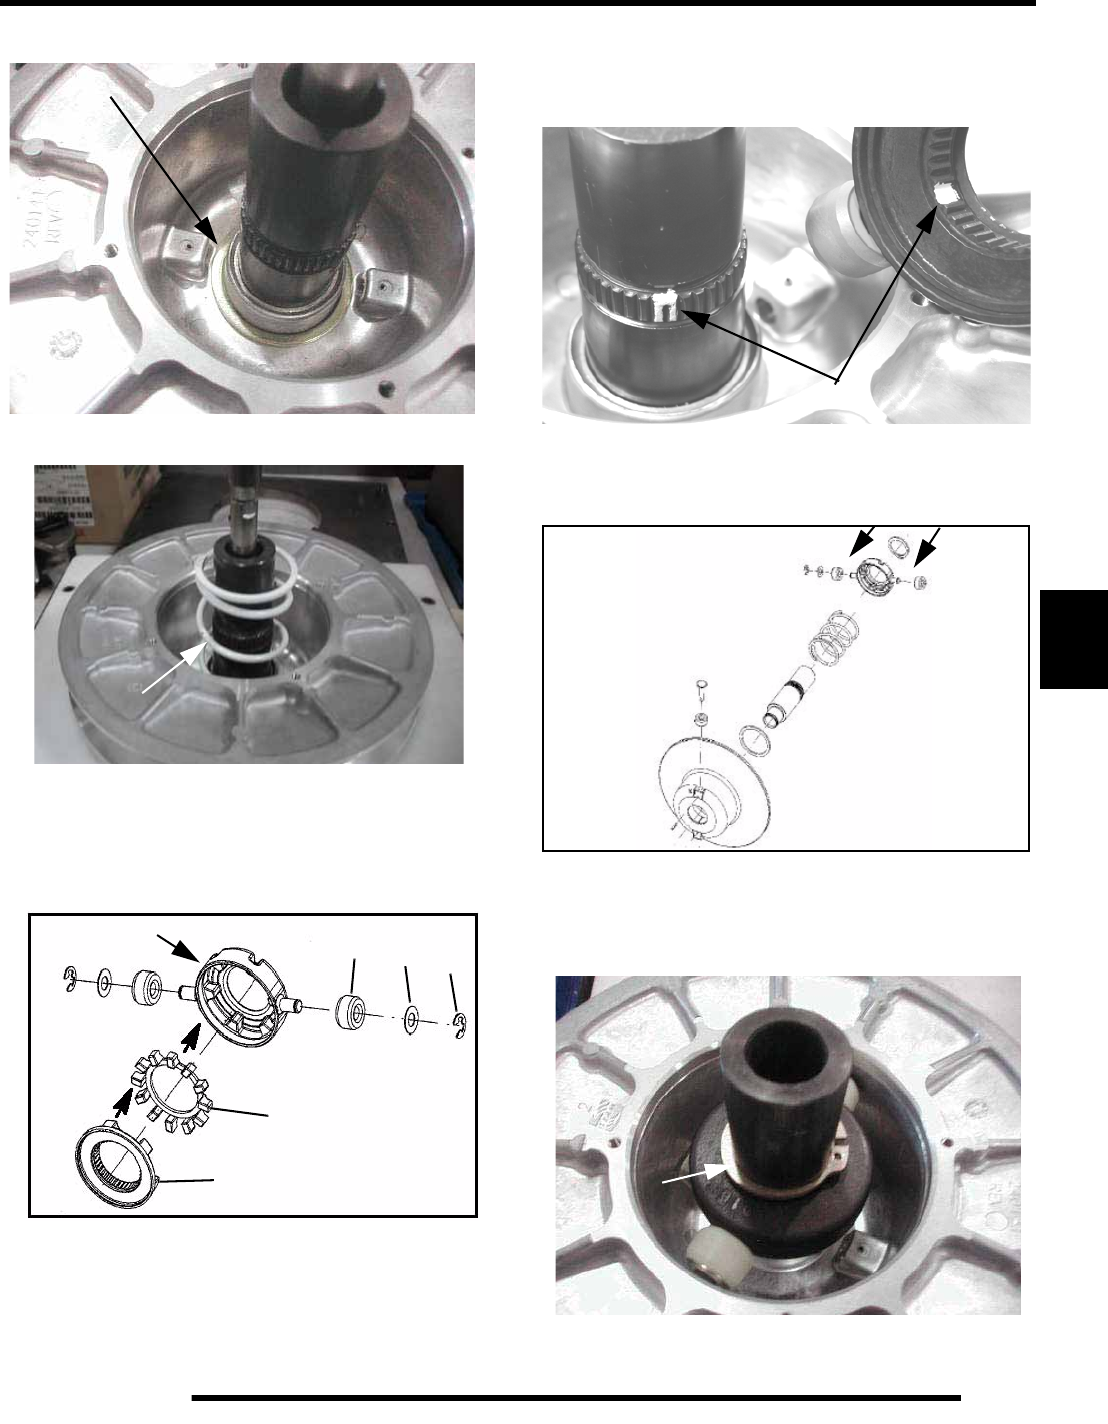
8. Install the spacer washer.
9. Install the spring over the shaft (arrow).
10. Install the clutch rollers (D) onto each side of the outside
spider. Install the washers (E) and E-clips (F) to secure the
rollers. Spin the roller, the rollers should spin freely.
11. Install the spider dampener (G) inside the outer spider and
install the inside spider plate (H).
12. Install the spider assembly onto the shaft with the retaining
ring on top of the spider. NOTE: Use the marks previously
made to align the skip tooth spider, or use the “X” on top
of the spider and align it with the skip tooth on the shaft.
13. Place the clutch into Clutch Compression Tool PN
8700220. Using Compression Extensions PN PS-45909,
Press down on the top of the spider assembly, pushing the
spider onto the shaft.
14. Slowly compress the spider into place. If the spider appears
to bind while compressing, stop and make sure the skip
tooth on the shaft and the spider are aligned. Once the
spider passes the retaining ring notch on the shaft, install
the retaining ring (A).
Install Spacer Washer
Outer Spider
H
G
D
E
F
Align Marks
Press Down on Spider
A
