10.38
ELECTRICAL
8. Reverse the steps to install the new housing and reassemble
the pod.
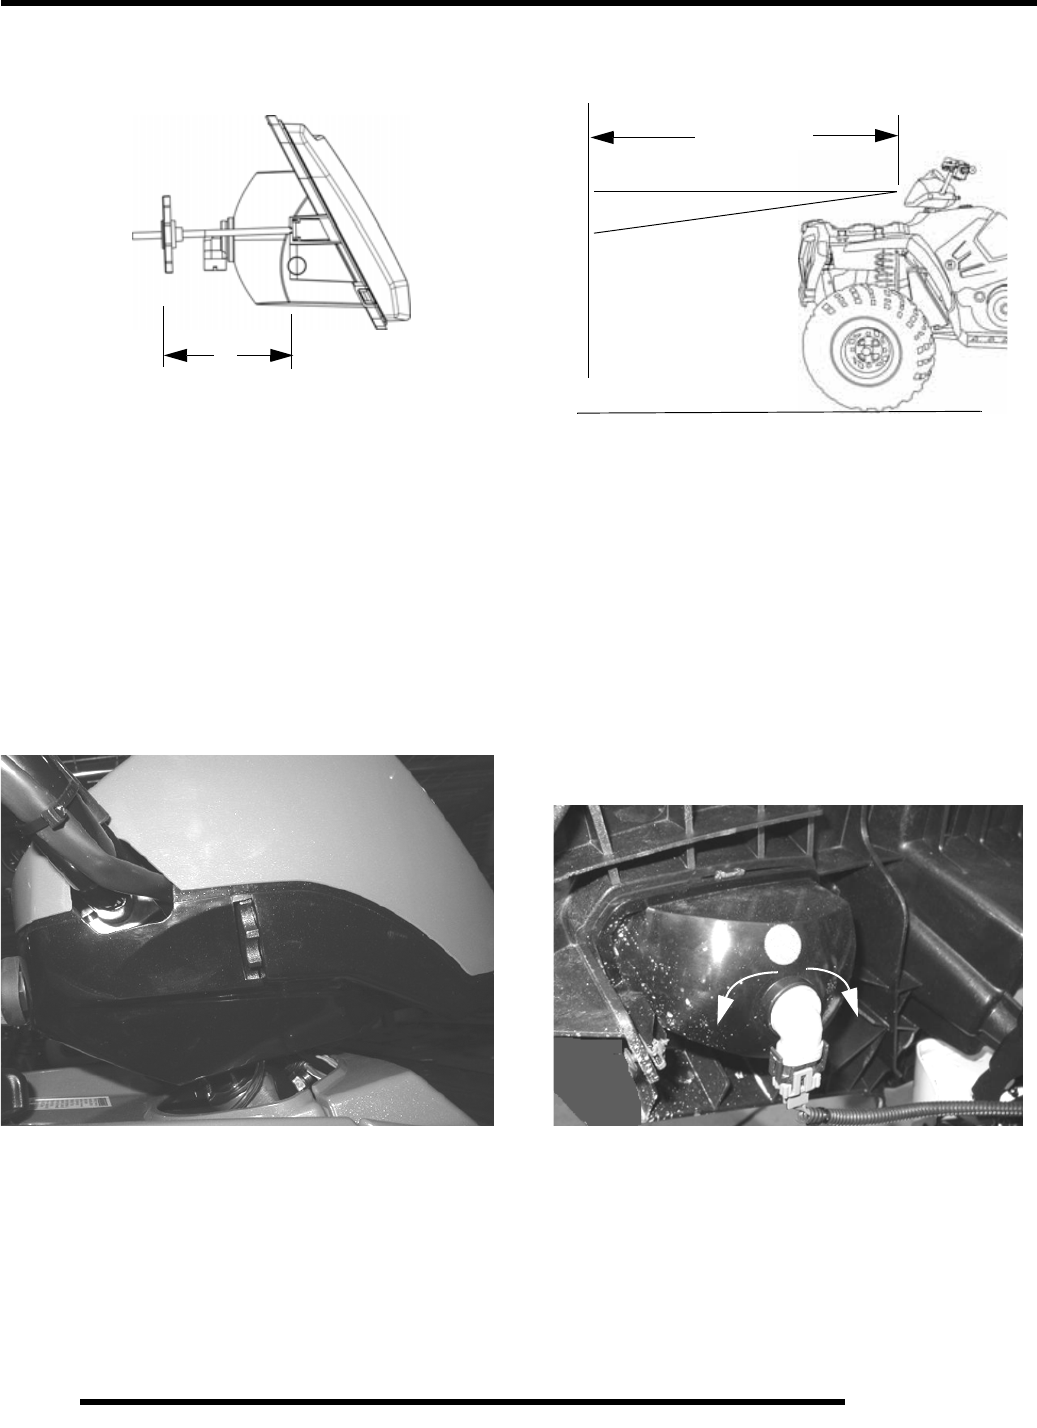
NOTE: he distance from the head lamp parting line
to the end of the adjustment knob stop is 5 1/8”, (13
cm). See illustration.
9. Adjust the headlight aim by turning the adjusting knob.
High Beam Headlight Adjustment
The headlight beam can be adjusted to any position desired by
turning the adjusting knob located on the bottom right side of the
headlight pod.
Raise Headlight - Turn knob counter- counterclockwise
Lower Headlight - Turn knob clockwise
1. Place the vehicle on a level surface with the headlight
approximately 25' (7.6 m) from a wall.
2. Measure the distance from the floor to the center of the
headlight and make a mark on the wall at the same height.
3. Start the engine and turn the headlight switch to high beam.
4. Observe headlight aim. The most intense part of the
headlight beam should be aimed 2” (5.1 cm) below the
mark placed on the wall in Step 2.
NOTE: Rider weight must be included on the seat.
On machines with separate low beam lights, the
drop should be 8, (20.3 cm) in 25' from the center of
the low beam lamp.
5. Adjust beam to desired position.
Lower Headlamp Removal / Installation
1. Turn the back of the head lamp harness in a counter-
clockwise direction to loosen.
5 1/8” (13 cm)
25’ (7.6 m)
2” (5.1 cm)
Lamp Center Height
Remove
Install
Turn Harness Assembly
