4. Install hose barb adapter and attach manometer
tube.
5. Turn gas supply to the oven back on.
6. Plug the unit in and turn the power switch ON.
7. Set the temperature control to its highest setting
and allow burner to ignite.
NOTE: The burner must be lit during test.
NOTE: Accurate gas pressure readings can only be
made with the gas on and the burner lit.
GAS
TYPE
PRESSURE READING (IN W.C.)
MANIFOLD
LINE
RECOMMEND MIN MAX
Natural 5.0 8.0 6 14
Propane 10 11.0 11 14
NOTE: If the incoming line pressure to the valve is
less than the minimum stated, then the manifold
pressure will not be maintained.
NATURAL GAS
• If the incoming pressure to the valve is between
6”WC and 14” for Natural gas and the manifold
pressure is not maintaining 5” WC, and the cap
is correctly positioned, replace the valve.
PROPANE
• 11”WC and 14” for Propane gas and the manifold
pressure is not maintaining 10” WC, and the cap
is correctly positioned, replace the valve.
VERIFICATION OF SPARK AT
IGNITOR
Disconnect the
electrical power to the machine and
follow lockout / tagout procedures.
SHUT OFF THE GAS BEFORE
SERVICING THE UNIT.
1. Remove the
Bottom Front Cover.
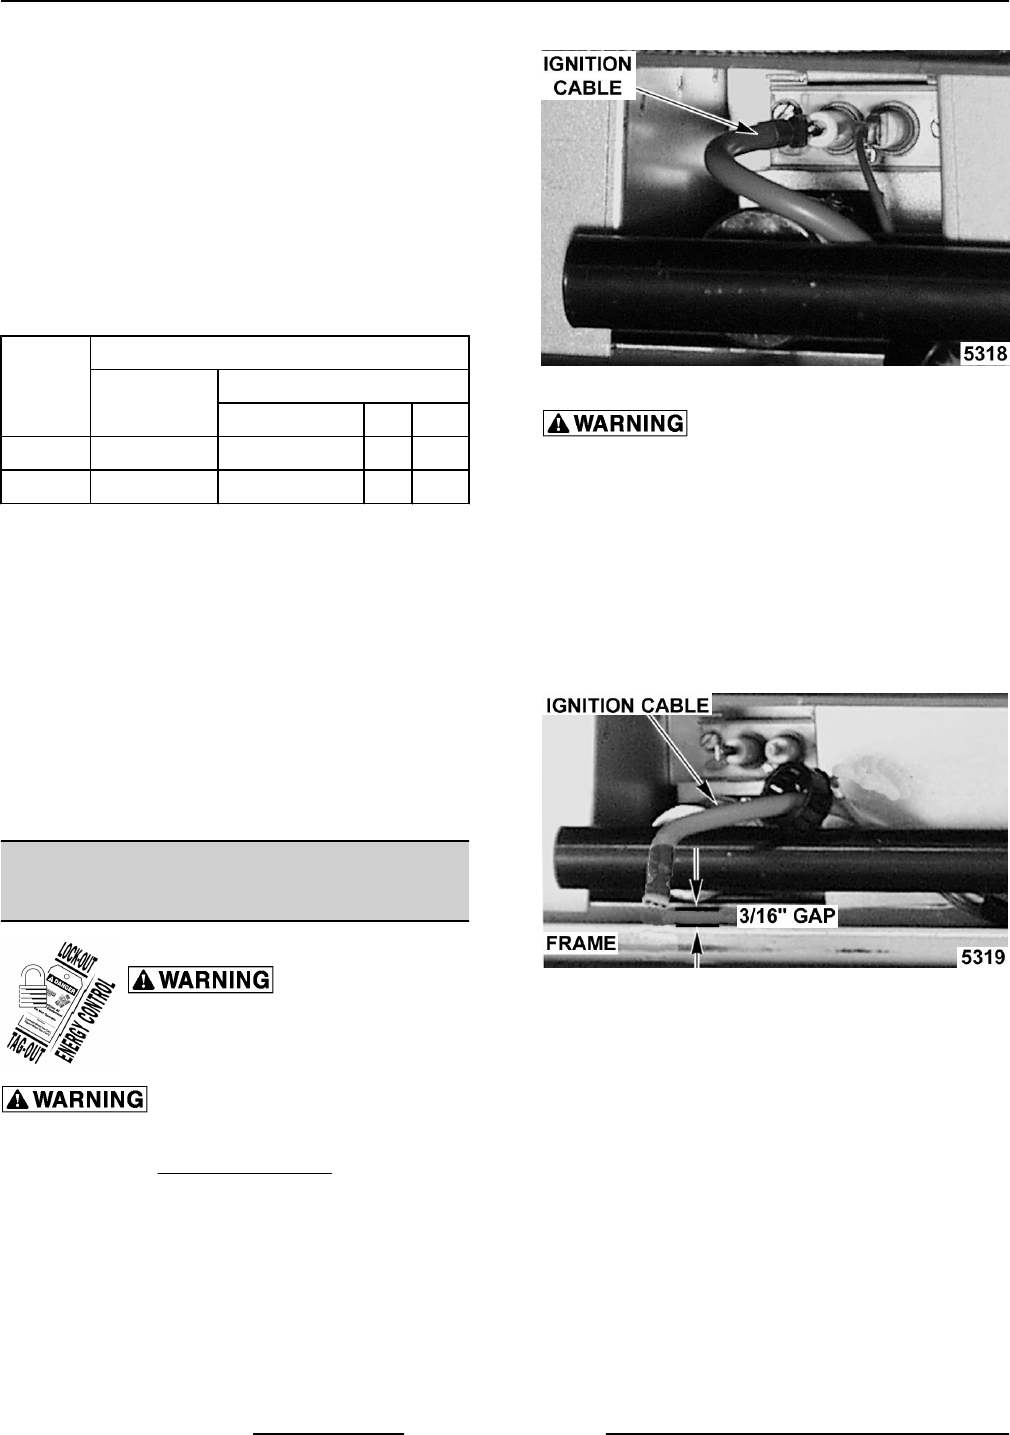
2. Disconnect the high voltage "ignition cable" from
the spark ignitor.
Fig. 60
DO NOT HOLD THE WIRE WITH
YOUR HANDS FOR THIS TEST. THE MANUAL GAS
VALVE MUST BE CLOSED.
3. Clamp the ignition cable in a manner that will
position the end of the cable 3/16" from the oven
frame (bare metal surface).
NOTE: It is critical that the cable be held 3/16" away
from the surface of the oven frame or sparking may
not occur even though the sparking circuit is
functioning properly.
Fig. 61
4. Plug the oven in and set the temperature control
to the maximum setting.
5. Turn the power switch ON.
6. Sparking should occur after a 4 second delay, for
a duration of 7 seconds then repeat twice after a
15 second purge time. Arching from the ignition
cable to the oven frame should be observed.
VC4G & VC6G SERIES FULL SIZE CONVECTION OVENS - SERVICE PROCEDURES AND ADJUSTMENTS
F24682 Rev. C (0315) Page 30 of 74


