2. Installation procedures
X mm
1
1
Image 2-19
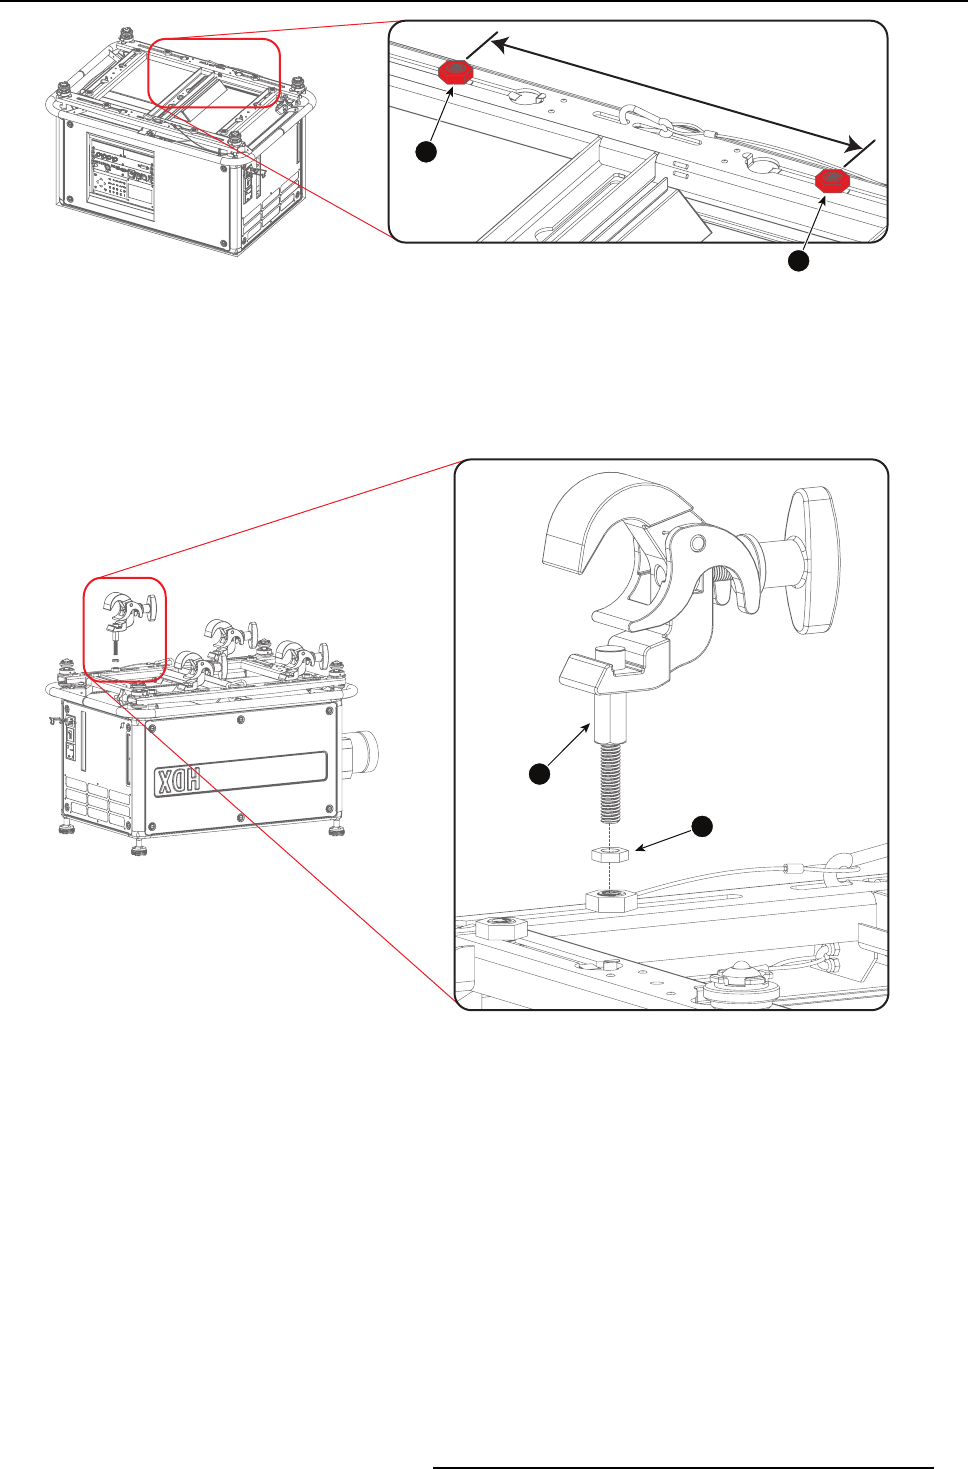
3. Mount the rigging clamps on the rigging points:
a) Screw the nut (reference 2, image 2-20) on the spacer (reference 3, image 2-20) to the desired height.
b) Install the spacer in the rigging point by turning it c lockwis e until the nut and the rigging point m eet.
Warning: M ake sure that the spacers are screwed in for minimum 2 cm in the rigging points. Failure to do so can cause the
projector to fall down.
Warning: A lways use 4 rigging points when suspending a p rojector.
2
3
Image 2-20
4. Position the projector under the truss and lower the truss until the truss support bars are nearby the rigging c lamps.
5. Lift the projector and hook the 4 rigging clamps over the truss support bars.
R5905106 TOP & BOTTOM CARRY HANDLE 28/06/2011
19


