


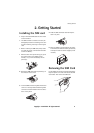
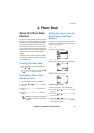


Phone Book
Copyright © 2004 Nokia. All rights reserved. 19
the SIM or internal Phone book, respectively.
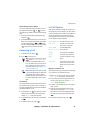
6 Press or until the desired name ap-
pears.
TIP: QUICK SEARCH: Press Names,
key in the first letter, for example A,
and scroll with or until the
desired name appears.
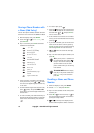
Erasing a Name and Phone
Number
You can remove names and phone numbers from
the selected Phone Book one by one or all at
once.
One by One
1 Recall the name and the number that you
want to erase.
2 Press Options.
3 Scroll with or to Erase and press
OK.
All at Once
1 While the display is clear, press Names.
2 Scroll with or to Erase and press
Select. Then choose Erase all and
press Select.
3 Scroll to the Phone Book to be erased
(Phone or SIM card) and press Select.
4 At the prompt Are you sure, press OK,
key in the security code and press OK. For
more information about the security code,
see chapter ‘Reference Information’ - ‘Access
Codes’.
Assigning a Phone Number as
a Speed Dial Number
The first nine names & phone numbers stored in
Phone Book are automatically stored as speed
dial numbers and can be speed dialled via the
number keys - . If you want to assign
another number to one of the speed dial keys, do
as follows:
1 Press Names and choose Speed Dials. If
no phone number is assigned to a key, press
Assign.
NOTE: Assign is also shown when the
phone has automatically assigned a
phone number from the Phone Book
to a speed dialling key.
2 Search for the desired name and/or phone
number from Phone Book, and press OK to se-
lect it.
If a phone number is already assigned to a key,
you can view the number, change it or erase it by
first pressing Options.
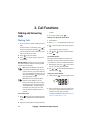
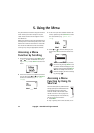
To Use the Speed Dial Key
Press the desired speed dial key ( to )
and press to make the call.
NOTE: Pressing and holding calls
your voice mailbox.
Caller Groups
You can set the phone to sound a specific ringing
tone and flash a preselected graphic on the dis-
play when you receive a call from a particular
phone number.
To make this happen, first include the phone
number in the desired caller group. Then define a
ringing tone and graphic for the caller group.
NOTE: You can set the phone to ring only
when you receive calls from phone num-
bers that belong to a specific caller
group. See chapter 8 ‘Profiles (Menu 3)’.