Installing Additional Components
Hot-Swap Power Supply Units
Chapter 3
22
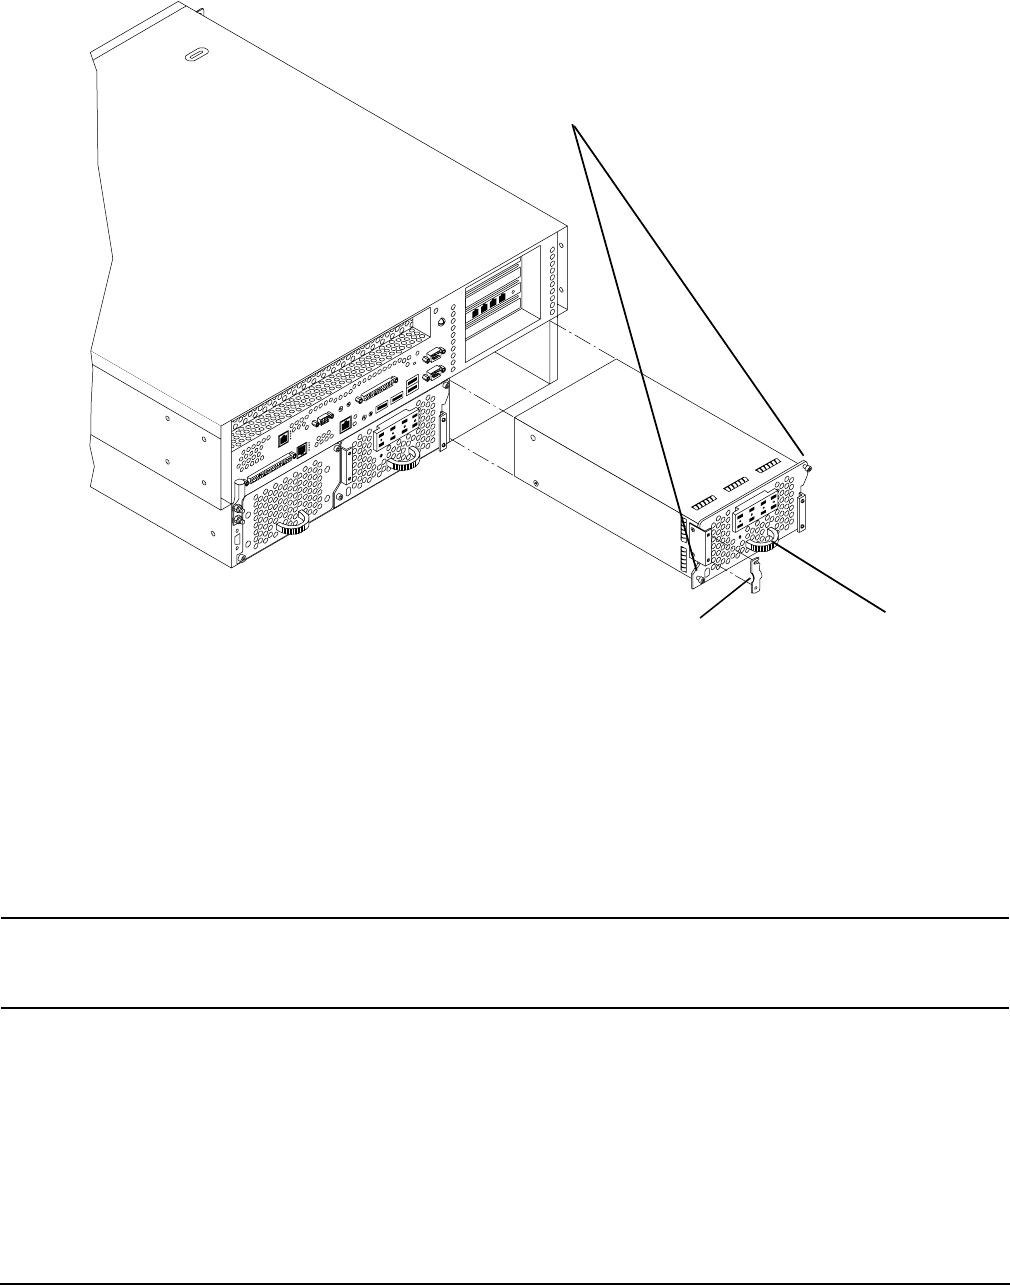
Figure 3-5 Removing a Hot-Swap Power Supply
Step 1. If rack-mounted, it may be necessary to extend a slide-mounted server out from the rack for better
access. If needed, slide the server out to the fully extended position.
Step 2. Remove power from the power supply being replaced. Disconnect power at the DC source end of the
power cable, using the disconnect device that is part of the rack or facility power system.
Step 3. Loosen the two knurled knobs on the power supply cable clamp to release the power feed leads.
Step 4. Press up on the two lower tabs of the terminal barrier strip cover to snap off the cover.
WARNING Always check that the power cable is not connected to a power source
before attempting to disconnect the power cable from power supply
terminals. Failure to heed this warning could result in injury.
Step 5. Loosen or remove (as appropriate) the screws that secure power cable leads to the terminal strip
and disconnect the power cable leads from the power supply.
Step 6. Reinstall the terminal strip hardware and the barrier strip cover (removed in steps 4 and 5) to
prevent loss. Hang the cover on the upper tabs and snap the cover into place.
Step 7. Using an ACX-15 torx screwdriver, loosen the two captive mounting screws that secure the power
supply to the server chassis.
chaspsxtnd
Mounting
Screws
Cable
Clamp
Handle


