


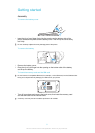
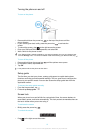
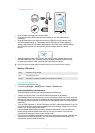


To charge the phone
1
Plug the phone charger into a power outlet.
2
Plug one end of the USB cable into the charger (or into the USB port of a
computer).
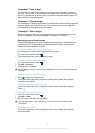
3
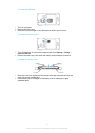
Plug the other end of the cable into the micro USB port on your phone, with
the USB symbol facing up. The battery status LED lights up when charging
starts. If the battery is completely discharged, it may take a few minutes before
the LED lights up after you connect the phone charger cable to a power
source.
4
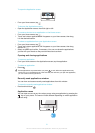
When the battery status LED is green, the phone is fully charged. Disconnect
the USB cable from your phone by pulling it straight outwards. Make sure not
to bend the connector when removing the cable from the phone.
Use the charger and USB cable provided with the phone to ensure faster charging.
Battery LED status
Green
The battery is fully charged
Red The battery level is low
Orange The battery is charging. The battery level is between low and full
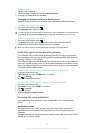
To check the battery level
1
From your Home screen, tap .
2
Find and tap Settings > About phone > Status > Battery level.
Improving battery performance
The following tips can help you improve battery performance:
•
Charge your phone often. This will not affect the lifetime of the battery.
•
Downloading data from the Internet is power consuming. When you're not using the
Internet, you can save power by disabling all data connections over mobile networks.
This setting does not prevent your phone from transmitting data over other wireless
networks.
•
Turn off GPS, Bluetooth™ and Wi-Fi® when you don't need these features. You can
turn them on and off more easily by adding the Quick settings widget to your Home
screen. You do not need to turn off 3G.
•
Use the Power Saver feature to reduce battery consumption. You can select the
power saving mode that best suits the way you use your phone. You can also
customise the settings of each power saving mode.
•
Set your synchronisation applications (used to synchronise your email, calendar and
contacts) to synchronise manually. You can also synchronise automatically, but
increase the synchronisation intervals.
14
This is an Internet version of this publication. © Print only for private use.