


This is the Internet version of the user's guide. © Print only for private use.
26 Calling
Entries saved as contacts are stored in your phone’s
memory, not on your SIM card. To synchronize your
phone-based contact list with your PDA or PC,
see “Synchronization” on page 65.
To set the fields in contact information
1. Scroll to Phone book/Options/Contact info.
2. Press to select or deselect fields.
If your phonebook is empty, you will be prompted to
copy information from your SIM card. If you press
NO,
you can add new contacts. If you press
YES, your contact
list will be copied from your SIM.
To add a contact
1. Scroll to Phone book,
YES, Add contact, YES.
2. Scroll to the field you want to fill in, press
YES.
3. Enter the information,
YES.
4. Select the next field and so on. To add more information
fields, press when working with a contact stored
in your phone.
5. When you have entered the information, scroll to Save
and exit?,
YES.
Tip: To enter an unsaved number, press when you
are in a number field, and select a number in the
unsaved numbers list.
Pictures, personal rings and voice commands
You can add a picture, personal ring signal and voice
command to a contact.
To add a picture to a phonebook contact
1. Scroll to Phone book,
YES, Pictures, YES.
2. Enter the first letters of the contact,
YES.
3. When the contact is highlighted, press
YES.
4. This takes you to My pictures. Select a picture and
press
YES twice.
• Select Personal rings to add a personal ring signal.
• Select VoiceCommands to add a voice command.
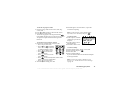
To call a contact from your contact list
1. From standby, press and hold one of the number keys
2-9 to find a contact beginning with the first letter
on that key (or closest following).
• For example, press and hold 5 to go to the first
contact beginning with “J”. To go to a contact
beginning with “L” press 5 three times after you
have entered the list of contacts.
2. When the contact you want to call is highlighted,
press
YES.
3. Select the number you want to call,
YES.
If only one number is linked to the contact, press and
hold
YES at step 2.