


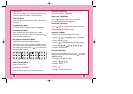

Mini Display
The small LCD on the outside of the cellcase is called
the Caller ID LCD. It displays the latest of the following
information until the cellcase is open. Once the cellcase
is opened, the main LCD displays the event status.
Caller ID LCD will display the following information:
- Time and date.
- Caller’s information. (name or number)
- Number of missed calls.
- Number of new messages.
- No service status and sleep mode.
Speed Dialing (see Dialing from Phone
Book on page 28)
Speed dialing is a convenient feature, allowing you to
make phone calls quickly and easily. Your phone
recalls the phone number from your personal directory,
displays it briefly, and then dials it.
1. Enter memory location number 1 to 199, except for
9. (Entry 9 is reserved for emergency calls.)
2. Press . The phone will recall the number
from memory, display it, and then dial it.
Caller ID
You can only use this feature if your service provider
has this option available and has set up the feature on
your phone.
24
25
If you have this feature, the phone number of the caller
will be displayed on the screen. If the screen reads,
Number is Unavailable then the caller has a call block
feature on his/her phone.
The name of the caller will appear on the screen
if the name and phone number of the person
calling is stored in the Personal Phone Directory
of your phone.
Phone Book Features
You can store up to 198 entries in the phone book
with easy access to your most frequently dialed phone
numbers. (Entry 9 is reserved for emergency calls.)
Personal Phone Book Memory
The phone has 198 personal phone book memory
locations where you can store up to 5 phone numbers
with 32-digit capacity on each phone number. (Entry 9
is reserved for emergency calls.)
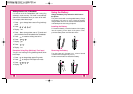
Saving Numbers in Your Personal Phone Book
Memory locations 1 through 8 should be used for one-
touch dialing for your most frequently used phone
numbers.
1. Enter phone number you want to save (up to 32
digits).
2.
Press Soft Key 1Opt , then a sub-menu will appear.
3. Select Save on the sub-menu.