


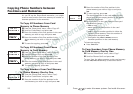

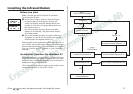
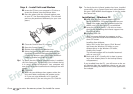


Step 1 – Check Infrared Support
Before installing the infrared modem you also need to
check if the Microsoft Infrared support for Windows
version 2.0 has been installed.
To do this, and also to check the version of the existing
infrared support on your computer, do the following:
Under Settings in the Start menu, select Control
Panel.
Select the Add/Remove Programs applet.
Check the version of the Infrared Support for
Windows 95 in the list under the Install/Unin-
stall tab.
• Version 2.0
If you have version 2.0 installed you do not
need to install the infrared support. Go to sec-
tion ‘Step 4 – Install Infrared Modem’ to continue
the installation of the infrared modem.
• Version 1.0
If you have version 1.0, you need to uninstall
this version before installing infrared support
version 2.0. Go to ‘Uninstall Infrared Support’ to
continue the installation of the infrared modem.
• No Infrared Support Installed
Go to ‘Step 3 – Install Infrared Support’ to con-
tinue the installation of the infrared modem.
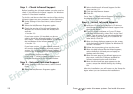
Step 2 – Uninstall Infrared Support
Under Settings in the Start menu, select Control
Panel.
Select the Add/Remove Programs applet.
Select the Microsoft Infrared Support for Win-
dows version 1.0.
Click the Add/Remove button.
Click OK.
Go to ‘Step 3 – Install Infrared Support’ to continue the
installation of the infrared modem.
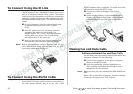
Step 3 – Install Infrared Support
Insert the CD into your computer’s CD drive or
the diskette containing the Infrared support into
the diskette drive.
If you are using a diskette or if your CD does
not start automatically, select ‘Run’ in the ‘Start’
menu. Type A:\setup if you are using diskettes
or D:\setup if you are using a CD (could be an-
other drive). Click OK.
When the Setup dialogue appears on the screen,
click the Install Infrared Support for Windows 95
version 2.0 button.
Follow the instructions given on the screen
When the Add Infrared Device Wizard appears,
select the Built-in infrared port on laptop or
desktop and click Next.
When the next page of the Wizard appears on
the screen, select the COM port enabled for
infrared communication and click Next.
When the third and last page appears on the
screen, accept the default settings by clicking
OK.
After the installation you will return to the Setup dia-
logue where you can continue the installations.
28 Press to enter the menu system. See inside the cover.