


Exchanging Messages 53
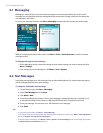
To receive a text message
Text messages are automatically received when the phone function is turned on. When the phone is turned
off, text messages are held by your wireless service provider until the next time the phone is turned on.
To reply to or forward a text message
• Select the message and click Menu > Reply, Menu > Reply All, or Menu > Forward.
• Open the message and click Reply, Menu > Reply All, or Menu > Forward.
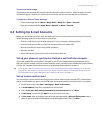
6.3 Setting Up E-mail Accounts
Before you can send and receive e-mail, you need to set up your e-mail account on your phone. You can set
up the following types of e-mail accounts on your phone:
• Outlook e-mail that you synchronize with your PC or your company’s Exchange Server
• Internet e-mail account that you have from an Internet Service Provider (ISP)
• Work account that you access using a VPN connection
• Windows Live Mail
• Other web-based e-mail accounts such as Gmail, Yahoo! Mail, etc.
Set up your phone to synchronize Outlook e-mail with the computer
If you have installed the synchronization software on your PC and created a partnership with your phone,
then your phone is ready to send and receive Outlook e-mail. If you have not yet installed the synchronization
software nor created a partnership, please do so by following the procedures in chapter 3.
Tip To set up your company e-mail account so that you can access Outlook e-mail messages wirelessly, you must set up
your phone to synchronize via a wireless LAN or over-the-air connection with your company’s Exchange Server. For
more information about synchronizing with your company e-mail server, see chapter 7.
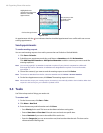
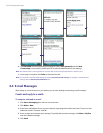
Set up a new e-mail account
You can easily set up an e-mail account that you have with an Internet service provider (ISP), a web-based e-
mail or an account that you access using a VPN server connection (typically a work account) on your phone.
1. On the Home screen, click Start > Messaging > New E-mail Account.
2. In E-mail address, enter the e-mail address for this account.
3. Select Try to get e-mail settings automatically from the Internet and click Next.
4. If Auto Setup is successful, click Next to move on to the next screen.
5. In Your name, enter your display name for e-mail messages while in Account display name, enter a
name for the account that should appear on the Messaging screen. Then, click Next.