


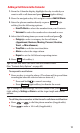
Adding a Schedule to the Calendar
1. From the Calendar display, highlight the day to which you
want to add a schedule.
2. Press (right softkey) > Add Schedule.
3. Enter the description and press .
Tip: While entering the description you can also press (right
softkey) to select a description from “From To Do List” or “Fr. Schedule
List”. (You need to store entries in those lists in advance. See “Adding To
Do Items” on page 72 for details.)
4. Enter other fields if necessary:
Ⅲ
Description to change the description for the schedule.
Ⅲ
Category to select a category (Appointment, Business,
Meeting, Personal, Vacation, Travel, or Miscellaneous).
Ⅲ
Priority to select a priority (None, High, or Low).
Ⅲ
Start to set a start time for the schedule.
Ⅲ
End to set an end time for the schedule.
Ⅲ
Location to edit the location of your schedule (up to 64
characters).
Ⅲ
Alarm to select the ringer for the alarm.
Ⅲ
Alarm Time to edit the alarm time (number of hours or
minutes before the event starts). Default alarm time is 10
minutes.
Ⅲ
Repeat to set the schedule’s repeating status.
5. Press (left softkey) to save the schedule.
Tip:Press the navigation key up or down to scroll by week through the
calendar, and to scroll by month.
In the monthly view, days with events scheduled are indicated by a
small
ᮣ just to the left of the date. In the weekly view, times for
which you have scheduled events are displayed as colored blocks.
Save
Mode
Options
70