c
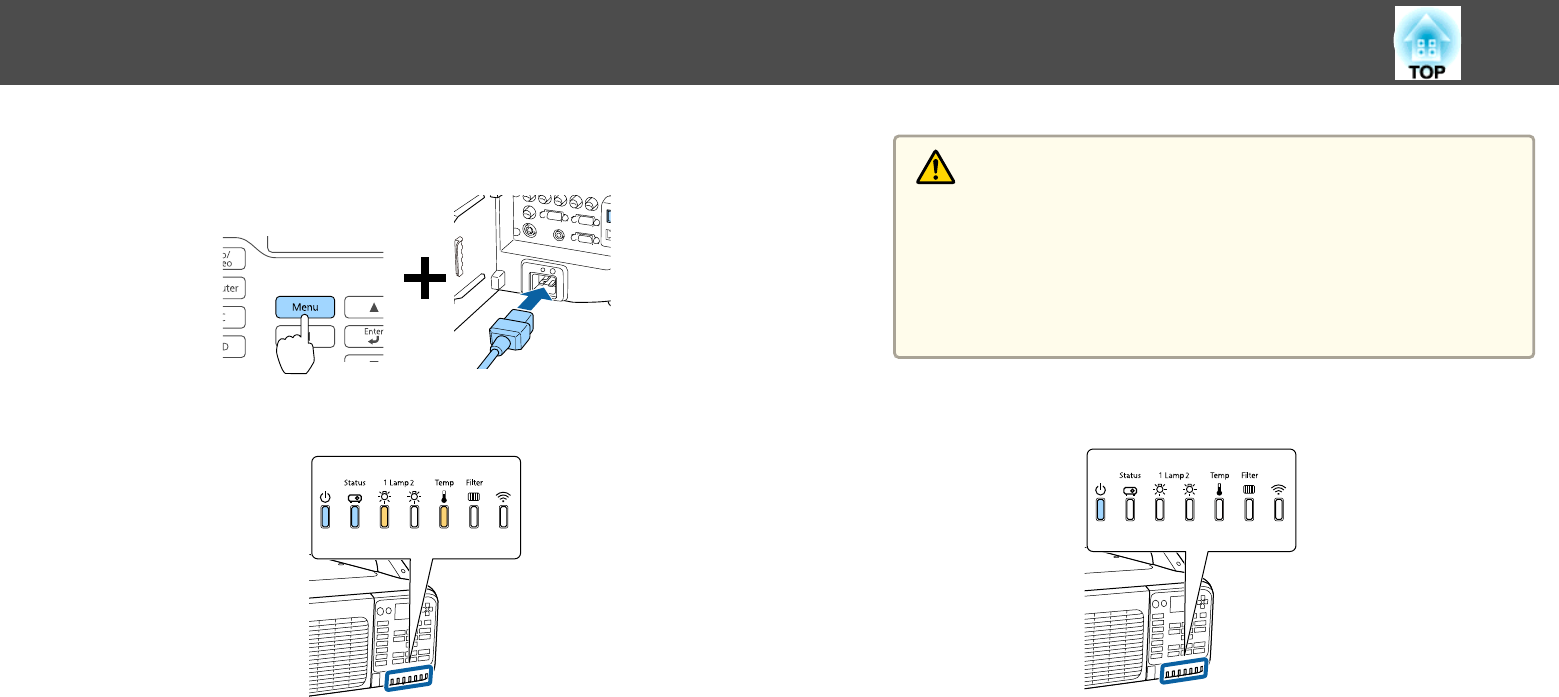
While holding down the [Menu] on the remote control or the
control panel, connect the power cord to the projector.
When the projector's indicators turn on as follows, release
the [Menu] button.
Power Status Lamp1 Temp
Blue - On Blue - On Orange - On Orange - On
The indicators remain on for about 75 seconds.
When all of the indicators start flashing, the settings are being
written.
Caution
• Do not disconnect the power cord from the projector while the
settings are being written. If the power cord is disconnected, the
projector may not start correctly.
• Do not disconnect the USB flash drive from the projector while the
settings are being written. If the USB flash drive is disconnected, the
projector may not start correctly.
d
When writing completes normally, the projector enters standby
status.
Power
Blue - On
When the projector is in standby status, remove the USB flash
drive.
Batch Setup
52


