


Section 2: Understanding Your Phone
80 2G: Using the Internal Phone Book
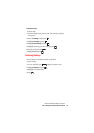
2. Highlight Phone Book and press .
3. Highlight Add New Entry and press .
4. Highlight Name and press .
5. Enter a name, and press .
6. Highlight Phone #1 and press .
7. Enter the phone number and press .
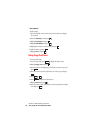
8. Highlight the appropriate phone type and press .
9. Select an additional category and press . (See “Items that Can Be
Stored in the Internal Phone Book” below.)
10.Enter the additional information and press or .
11.Press .
Tip: You can include pauses in a phone number. (See “Dialing Options”
on page 29).
Tip: If you store an entry in the Internal Phone Book when Secret Mode
is set to ON, the entry is stored as secret data. (See “Setting the Secret
Mode” on page 53).
ItemsthatCanBeStoredintheInternalPhoneBook
You can store the following items in the Internal Phone Book:
ᮣ
Name: Stores a name.
ᮣ
Phone #1–#5: Used to store up to 5 phone numbers.
ᮣ
Phone Type: Once you have stored a phone number, you can select
Mobile, Home, Office, Fax, Data or No Label as the Phone Type. You
can also switch between Normal Phone Type and Priority Phone Type
by pressing Soft Key right. When you are making a call from a Phone
Book that contains multiple stored phone numbers, this function calls
the number set as the Priority number.
ᮣ
Email: Stores an e-mail address.
ᮣ
Email Type: Once you have stored an e-mail address, you can select
Mobile, Home, Office or No Label as the Email Type.
OK
OK
OK
OK
OK
Next
OK
OK
Next
OK
Save