


Nokia PC Sync
[ 16 ]
5
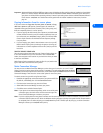
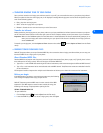
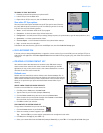
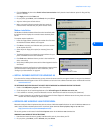
TO ENABLE PC SYNC ON STARTUP
1 Establish an infrared link between your phone and PC.
2 Launch PC Sync from the Start menu.
3 Right-click the PC Sync tray icon, then click Enable on startup
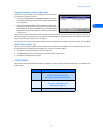
View other PC Sync options
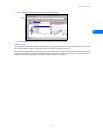
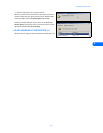
There are several other options available from the PC Sync options menu (from the
tray icon). With the phone connected to your PC via infrared, right-click on the tray
icon, then click any of the following options:
• About - to view information about the PC Sync program
• Connection - to check the status of the infrared connection
• Configuration - to modify current PC Sync settings (change frequency of synchronization, types of data synchronized, etc.)
• Synchronize - to initiate synchronization of data
• View Last Report - to view information about the last synchronization attempt
• Help - to launch the on-line Help files
To disable the auto start features, right-click on the PC Sync icon, then click Enable On Startup again.
• USE A DIFFERENT PIM
If at some point you change PIM applications or upgrade to a newer version of your current PIM, you must configure PC Sync to
work with the new application. Select New Synchronization from the Nokia PC Suite program group, then follow the instructions
on page 14.
• CREATING A CUSTOM CONTACT LIST
Users who have more than 200 names and numbers in their PIM should create a
custom contact list or subset of their master contact list. Depending on the PIM
application you use, you may need to create a new contact database file or create a
new folder to store the custom contact list.
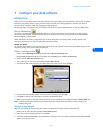
Outlook users
Outlook users can create folders and sub-folders in their Outlook database files. To
create a custom contact list, first create a new folder to store contacts. Then copy the
desired contact information from your main contacts folder to the new folder. PC Sync
allows you to synchronize your phone with the Outlook contacts folder of your
choosing.
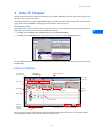
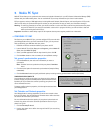
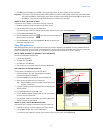
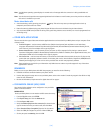
CREATE A NEW FOLDER FOR PHONE CONTACTS
To create a new sub-folder for a custom contact list:
1 Click File, point to Folder, then click New Folder.
2 Type the name of your new folder (example: Phone list).
3 Click the Folder contains drop-down arrow, then click Contact Items.
4 Select a location for your new folder (example: click Contacts to make Phone
list a sub-folder of your main Contacts folder).
5 Click OK to confirm your selection.
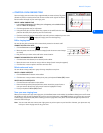
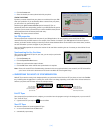
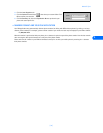
COPY CONTACTS TO CUSTOM PHONE LIST
To copy contact information into your new sub-folder:
1 Click the Contacts button on your Outlook bar.
2 Select the contacts you want to appear in your custom list.
Tip: Hold the CTRL key to select multiple contacts that are not adjacent to each other.
3 Click Edit, then click Copy (or press CTRL + C).
4 Select your custom folder from the Folder List (example: Phone list), or press CTRL + Y to display Go to Folder dialog box.