12 Setting Up the Projector
Connecting to a Laptop Computer
You can connect the PowerLite projector to any computer that has a
standard video output (monitor) port, including PC notebook and
laptop computers, Macintosh PowerBooks and iBooks, and hand-held
devices.
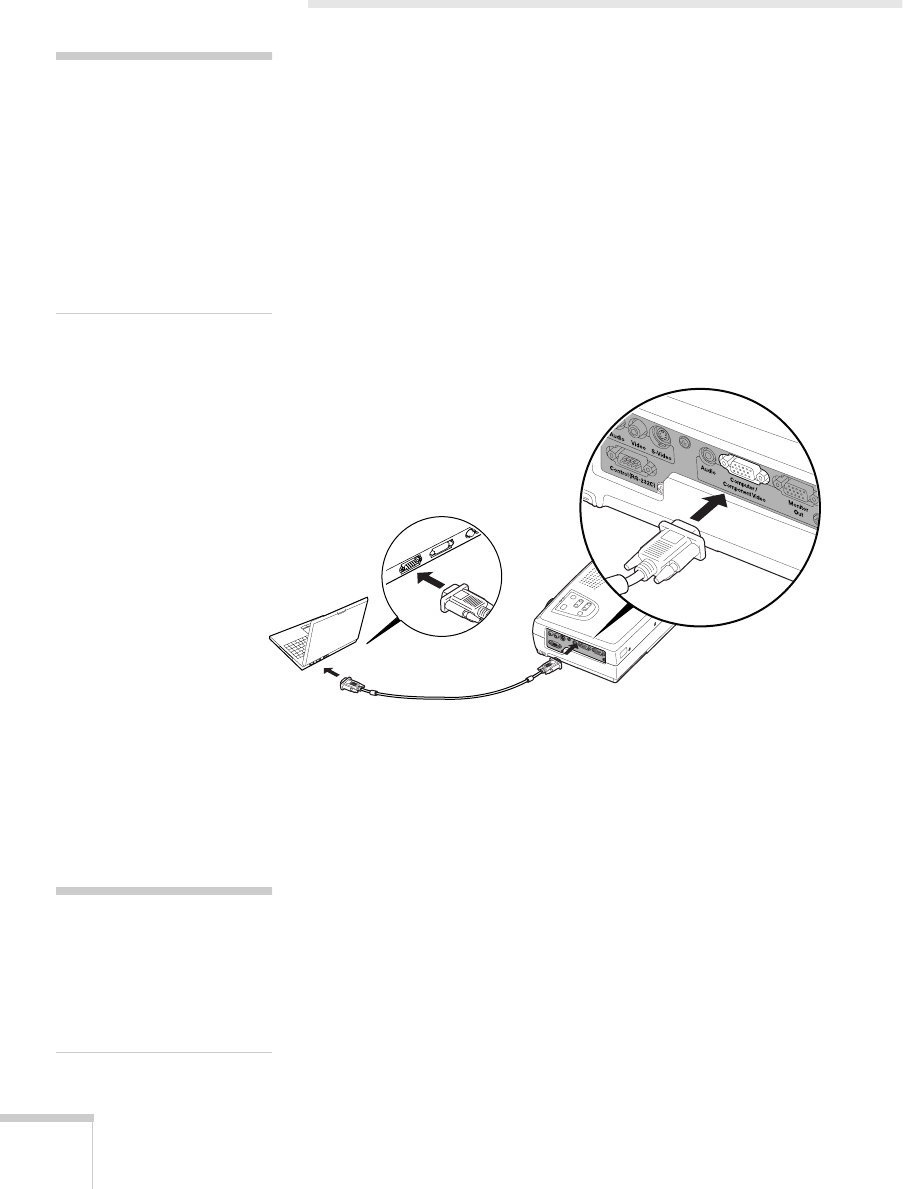
Connecting the Computer Cable
Before you start, make sure your computer and the projector are
turned off.
1. Connect one end of the computer cable to the projector’s
Computer/Component Video
port.
2. Connect the other end of the computer cable to your laptop’s
video-out or monitor port.
If you’re using an older PowerBook or iBook and you can’t
connect the cable, you may need to use the Macintosh desktop
adapter as shown on page 71 (available from EPSON; see page 7).
For a PowerBook with a DVI output port, you’ll need to use a
DVI to VGA adapter. An adapter may have come with your
computer. See your PowerBook documentation for instructions.
3. Tighten the screws on the connectors.
If you don’t need to make any other connections, you can plug in
your projector and turn it on. See page 20 for instructions.
note
To connect to desktops and
other computer systems, see
ppendix A. If you are
connecting an iBook with an
RCA video-out port or a
PowerBook with an S-Video
ort, follow the instructions
or connecting to a video
device on page 15.
note
Laptop configurations vary.
See your computer manual
or the location of the ports
needed to connect your
rojector.
52c.book Page 12 Wednesday, October 9, 2002 2:32 PM
