


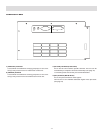
12
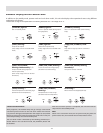
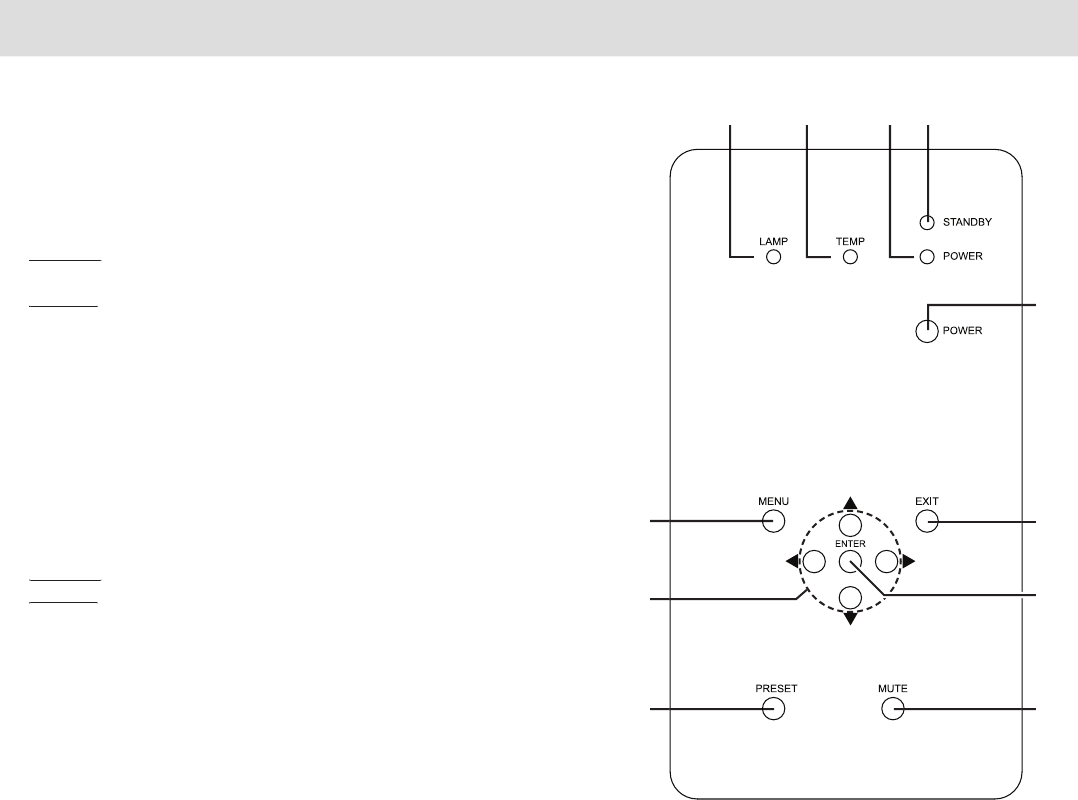
1. LAMP INDICATOR:
Light On:
Light On:
Indicates the lamp has been used for more than 1900
hours.
Blinking:
Blinking:
Indicates that lamp usage time (about 2000 hours)
is exceeded. Please contact your Vidikron dealer to
replace the lamp.
2. TEMP
INDICATOR
Blinking: Indicates the temperature inside the projector is
abnormally high.
3. POWER
INDICATOR
Light On: During projection.
4. STANDBY
INDICATOR
Light On:
Light On:
When in standby mode.
Blinking:
Blinking:
When in cool down mode.
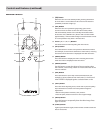
5
. POWER BUTTON
When this projector is in standby mode, pressing this button
for more than 1 second will turn the projector on and cause the
[POWER] indicator to light up. Press it one second or more again,
and the projector goes into the cool down mode and fi nally into
stand by mode.
• The [POWER] button will not work within approximately 1
minute of the light-source lamp being turned on. Hence wait
about 1 minute before pressing.
6
. MENU BUTTON
Press this button to enter or exit the menu mode. When the
main menu is displayed, pressing this button will cause the
menu to disappear.
7
. EXIT BUTTON
Press this button to display the previous menu (For example,
from sub menu to main menu). Pressing this button when the
main menu is displayed will clear the menu.
8
. CURSOR BUTTON
S
These buttons are used in the menu mode to select an item,
adjust the value etc.
9
. ENTER BUTTON
Press this button to show the next hierarchical menu (for
example, to enter submenu from main menu). It is also used
when “ENTER” is displayed against a selection item on the menu
screen.
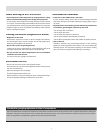
1
2
3
4
5
7
9
11
10
6
8
10. KEY RESET BUTTON
Use this button to reset the values to factory settings when the
“Gamma”, “White Bal.”, “Blanking” or “Picture Adjust” item in the
menu is selected.
11. MUTE BUTTON
Use this button to temporarily halt the video output. Press again
to resume.
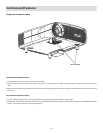
Control Panel on the Projector
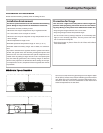
Controls and Features (continued)
Access to this item requires opening the Chassis Cover. For instruc-
tions on how to remove the Chassis Cover see Page 10.