


8. Contacts 99
Contacts
To create a Contacts entry:
1. Press / > Contacts > [New Contact].
2. To assign a name to the entry:
Ⅲ Select Name. Enter the name and press r.
3. To assign a ring tone or picture to the name
(optional):
Ⅲ Select Ring Tone/Picture, select a ring tone or
picture, and then press
Back (right softkey).
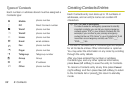
4. To assign a Contacts type to the number or
address being stored:
Ⅲ Highlight the Contacts type field.
Ⅲ Scroll left or right to select a Contacts type
(
Mobile, DC, Work1, Work2, Home, Email, Fax,
Pager, Talkgroup, Group, IP or Other).
5. To store a number or address:
Ⅲ Select the # field (or ID for an email address, or IP
for an IP address).
Ⅲ Enter the number or address. For phone
numbers, use the ten-digit format. For Direct
Connect numbers, be sure to include the
asterisks (*).
Ⅲ For email addresses, see “Entering Text” on
page 16.
Ⅲ When you are finished, press r.
6. To assign more options to the number, including
Speed # and Voice Name, select [Options] and
proceed to steps 7-9. Otherwise, skip to step 10.
7. The default Speed Dial number assigned to a
phone number is displayed in the
Speed # field.
This is always the next available Speed Dial
location. To assign the phone number to a different
Speed Dial location:
Ⅲ With the Speed # field highlighted, press r.
Ⅲ Press Delete (right softkey) to delete the current
Speed Dial number.
Ⅲ Enter the new Speed Dial number and press r.
8. To create a voice name for a number, select Voice
Name. Follow the prompts to record a name.
Speak clearly into the microphone.
9. When you are finished, press Back (right softkey).
10. To add more numbers or addresses to the entry:
Ⅲ Scroll past the information you already entered.