23
Getting Started
Main Page Sequence
23
Getting Started
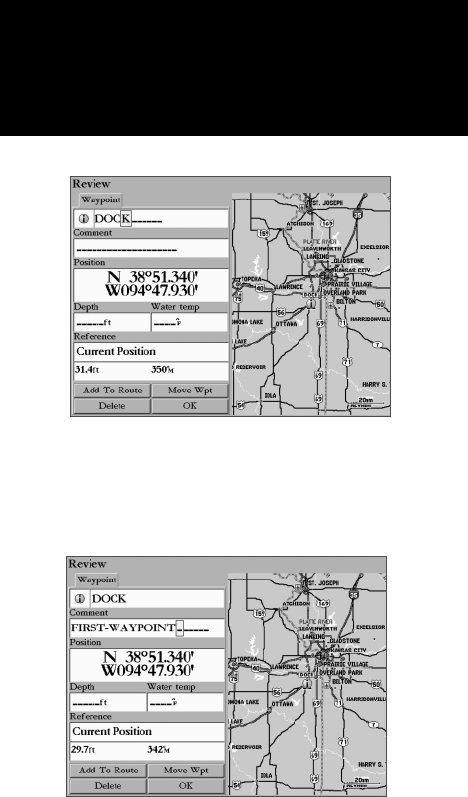
Creating Waypoints
Use the ARROW KEYPAD or DATA ENTRY
keys to enter a waypoint name.
Use the ARROW KEYPAD or DATA ENTRY
keys to enter a Comment.
3. For example if you wished to enter “PRACTICE 1” as a waypoint name. Press the DATA ENTRY key
labeled “P, Q, R, S, 7” one time to enter the letter “P”. (If you are entering a letter/number from the same
key, pause briefl y and the unit moves to the next placeholder automatically. Otherwise, press the next
letter/number from a different key.)
4. Press the same key three times to set the letter “R”. Continue entering the name until “PRACTICE” is
spelled.
5. To move the cursor to the right one space, press the
ARROW KEYPAD to the right one time.
6. Finish the waypoint name by selecting the number “1”.
7. Press ENTER to accept the new name.
Directly below the Name fi eld is a Comment Field. You can enter a comment of up to twenty digits
about the waypoint in this fi eld. For some more practice, enter “First Waypoint” in the comment fi eld.
Entering a Comment:
1. Highlight the ‘Comment’ fi eld and press ENTER.
2. Using the
ARROW KEYPAD and DATA ENTRY keys, enter “FIRST WAYPOINT”.
3. Press
ENTER to accept the comment.
Now that you have fi nished modifying the waypoint you will need to save it to the Waypoint List. See
page 41 for more information on waypoints and waypoint options.
To Save the Waypoint:
1. Using the ARROW KEYPAD, highlight the ‘OK’ button at the bottom of the Review page.
2. Press ENTER to save the waypoint.
Data Entry Tips:
•
. When using the ARROW KEYPAD, press and hold the key if you want the unit to scroll through the
alpha-numeric list quickly.
•
When using the DATA ENTRY keys, rapidly press the key the appropriate number of times for the char-
acter that you want to display. The number is always last. The unit automatically advances to the next
character position.


