


8-4
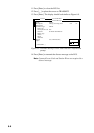
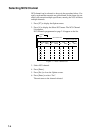
5. When the test is completed the screen shows the results of the
test.
1. Login
2. Logout
3. Abort
4. Select NCS
5. Ocean Region
6. Test
Options
1. PV Test
2. PV Test Result
3. Self Test
4. Distress Alarm Button Test
Test
CPU1
ROM
RAM
DP-RAM
Viterbi
Press any key to escape.
165-0086-100
OK
OK
OK
OK
CPU2
ROM
RAM1
RAM2
EEPROM
GPS
DP-RAM
165-0087-103
OK
OK
OK
OK
OK
OK
Communication Unit
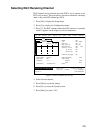
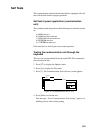
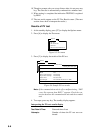
Figure 8-2 Sample communication unit self test results
Either “OK” or “NG” (No Good) appears next to each ROM and
RAM tested. NG display releases the audible alarm. For defec-
tive ROM, RAM, DP-RAM, EEPROM or VITERBI replace the
CPU Board. For GPS, NG appears when there is no GPS board or
it is faulty.
6. Press any key to finish the communication unit test.
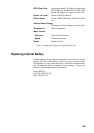
Performance Verification (PV) Test
After the FELCOM 12 is installed, the installing technician usually
confirms that the unit is functioning properly and is logged in with
the Inamarsat C system by conducting the PV test.
The PV test consists of the message reception test, message transmis-
sion test and distress alert test.
The results of the test appear on the PV test result display.
Note that the test cannot be conducted from a 2nd DTE. Note also
that the test can be initiated by a LES.
PV test sequence
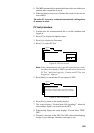
1. Select PV Test on the Test menu.
2. The NCS acknowledges request for testing.
3. The MES, upon receiving acknowledgment from NCS, goes into
pending state.
4. NCS will select a (not busy) LES to perform the test.
5. The LES transmits a test message to the MES.
6. MES transmits a test message to the designated LES.
7. LES receives test message.