


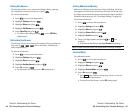

Using Special Numbers
You can save three special numbers in addition to your internal
Phone Book entries (the same number may be in both
directories). You can make and receive calls from special
numbers even when your phone is locked.
To add or replace a special number:
1. From the Security Menu display (See “Accessing the
Security Menu” on page 54), highlight Othersand press
.
2. Highlight Special #s and press .
3. Highlight the box under the entry number and press .
4. Enter the number you wish to add and press .
– or –
Press (right softkey), then highlight From Ph. Book
or Voicemail and press .
To insert pauses into a number:
1. From step 4 above, enter the phone number and press
(right softkey) for the options.
2 Highlight Hard Pause, 2-Sec. Pause, or Hyphen and press
.
3. Finish entering the rest of the numbers and press .
Note:During Speed Dial entry, there are no Speed Dial options associated with
special numbers.
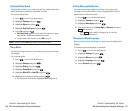
Erasing the Internal Phone Book
To erase all the names and phone numbers in your internal
Phone Book:
1. From the Security Menu display (See “Accessing the
Security Menu” on page 54), highlight Erase Ph. Book and
press .
2. If you’re sure you want to erase your Phone Book, highlight
Yes and press .
Options
Options
Section 2: Understanding Your Phone
2C: Setting Your Phone’s Security 57
Restricting Calls
You can restrict which phone numbers you can dial or receive
calls from. (The Restrict Calls setting does not apply to 911 or
Qwest Wireless
TM
Repair.)
To restrict calls:
1. From the Security Menu display (See “Accessing the
Security Menu” on page 54), highlight Othersand press
.
2. Highlight Limit Use and press .
3. Select the menu under Outgoing Calls or Incoming Calls and
press .
4. Highlight your desired option and press .
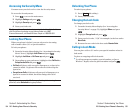
Options:
ᮣ
Allow All: You can make or receive all calls.
ᮣ
Phone Book Only: Only Phone Book entries, Voicemail or
Special #s (see the next page) are available to make or
receive calls.
ᮣ
Special #s Only: Only three special numbers’ entries are
available to make or receive calls.
ᮣ
To unrestrict all calls, select Allow All during step 4 above.
Note:Restricted incoming calls are forwarded to voicemail.
Section 2: Understanding Your Phone
56 2C: Setting Your Phone’s Security