


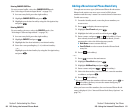
Erasing Call History
To erase individual Call History entries, see “Call History
Options” on page 70.
To erase Call History:
1. Press to access the main menu.
2. Highlight Call History and press .
3. Highlight Erase History and press .
4. Highlight the category you want to erase and press .
5. Highlight Yes and press .
ᮣ
You can also select All Calls during step 4 above to erase all
entries.
Section 2: Understanding Your Phone
2F: Managing Call History 73
After you have saved the number, the new internal Phone Book
entry is displayed. (See “Internal Phone Book Entry Options” on
page 76.)
Note:You cannot save phone numbers already in your internal Phone Book
or from calls identified as No ID or Restricted. If the selected entry has
already been stored in the phone book,
Alternateappears. (See “Saving a
Phone Number from Call History” on the previous page.)
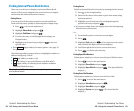
Prepending a Phone Number From Call History
If you need to make a call from Call History and you happen to
be outside your local area code, you can add the appropriate
prefix by following these steps:
1. Highlight a call history entry and press .
2. Highlight Prepend and press .
3. Enter the digits you want to add to the number.
If you want to save the number, press and select
Save Phone# from options. If not, the changes only apply to
the current call.
To select an option, highlight it and press .
ᮣ
Call to dial the phone number.
ᮣ
Save Phone# to store the phone number in your internal Phone
Book.
ᮣ
Hard Pause to insert a hard pause. (See “Dialing and Saving
Phone Numbers With Pauses” on page 25.)
ᮣ
2-Sec. Pause to insert a 2-second pause. (See “Dialing and
Saving Phone Numbers With Pauses” on page 25.)
T
H
Section 2: Understanding Your Phone
72 2F: Managing Call History