UEFI Menu Operations
TABLE 3.61 Display Contents of the Operation Help Display
Moves the cursor up and down.
Returns to “3.1 Front page of Boot Manager”.
“TABLE 3.62 Display Contents of the Operation Help Display when Pop-up Window appears” when pop-up
window appears shows the display contents of the Operation Help Display when the pop-up window is
appeared.
TABLE 3.62 Display Contents of the Operation Help Display when Pop-up Window appears
Moves the cursor up and down.
<Enter>=Complete
Selects the items.
Closes the pop-up window.
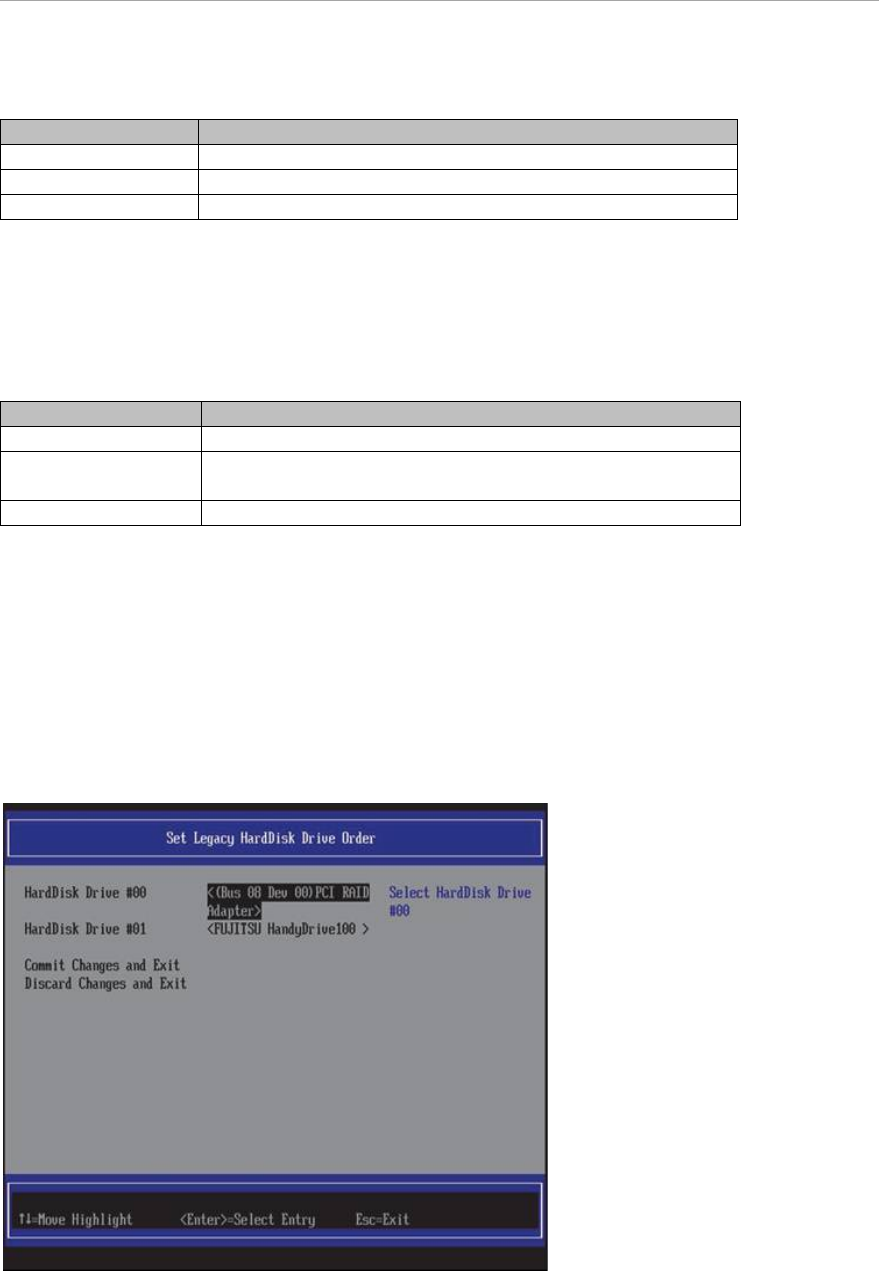
Change of the Priority Level (Set Legacy HardDisk Drive Order)
HDD which is targeted for activation is installed in the following sequence.
1. In the window shown in “FIGURE 3.54 Change of the Priority Level (Set Legacy HardDisk Drive Order)
(1)”, place the cursor on HardDisk Drive #N which wants to change the device. In the “FIGURE 3.54 Change
of the Priority Level (Set Legacy HardDisk Drive Order) (1)” HardDisk Drive #00 is selected.
FIGURE 3.54 Change of the Priority Level (Set Legacy HardDisk Drive Order) (1)
1. Press [Enter] key. A pop-up window shown in “FIGURE 3.55 Change in Priority Level (Set Legacy
HardDisk Drive Order) (2)” appears.


