• Reverberation — To adjust the amount of echo,
select the desired effect.
• Doppler effect — Select On to have the ringing tone
sound higher when you are closer to your device,
and lower when you are farther away. This setting
is not available for all effects.
To listen to the ringing tone with the 3–D effect, select
Options > Play tone.
To adjust the volume of the ringing tone, select
Menu > Tools > Profiles > Options >
Personalise > Ringing volume.
Volume control
To adjust the earpiece volume during a phone call or
the volume of the media applications, use the volume
keys.
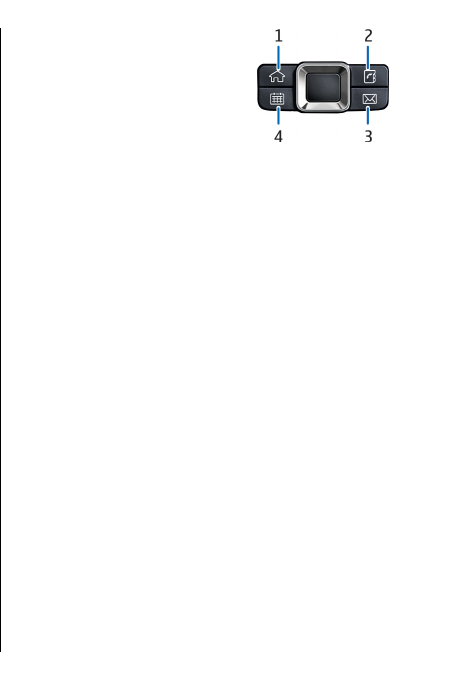
One-touch keys
With the One-touch keys you can access applications
and tasks quickly. Each key has been assigned an
application and a task. To change these, select Menu >
Tools > Settings > General > Personalisation >
One-touch keys. Your network operator may have
assigned applications to the keys, in which case you
cannot change them.
1 — Home key
2 — Contacts key
3 — E-mail key
4 — Calendar key
Home key
To access the main menu, press the home key briefly.
Press the home key briefly again to access the active
standby.
To view the list of active applications, press the home
key for a few seconds. When the list is open, press the
home key briefly to scroll the list. To open the selected
application, press the home key for a few seconds, or
press the scroll key. To close the selected application,
press the backspace key.
Leaving applications running in the background
increases the demand on battery power and reduces
the battery life.
Contacts key
To open the Contacts application, press the contacts
key briefly.
27
Your Nokia E51


