


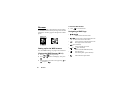


99 Messages
6.
Select “Send”, then press .
The confirmation screen of file size is displayed.
7.
Select “Yes”, then press .
After the message has been sent, the message is
added to the Sent box.
To Enter the Subject of the Message
1.
Perform steps 1 to 3 in “Creating a New MMS” on
page 98.
2.
Press [Options] to display the Options Menu.
3.
Select “Subject”, then press .
4.
Enter the subject of your message, then press .
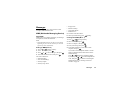
To Add Recipients
1.
Perform steps 1 to 5 in “Creating a New MMS” on
page 98.
2.
Press or to select “Add address”, then press
.
3.
Select “To” to add recipients or “Cc” to send a copy
of this MMS to other recipients by pressing or
, then press .
4.
Select a desired number from the list by pressing
or , then press .
5.
Enter the phone number or E-mail address of the
other recipients, then press .
6.
Press [Back] twice.
To Use the Text Template
1.
Perform steps 1 to 3 in “Creating a New MMS” on
page 98.
2.
Press [Options] to display the Options Menu.
3.
Press or to select “Insert Template”, then
press .
4.
Select the desired template from the list by pressing
or , then press .
To Save a Message in the Drafts Box
You can save a message in the Drafts box temporarily
and send it later, without sending it immediately.
1.
Perform steps 1 to 5 in “Creating a New MMS” on
page 98.
2.
Press or to select “Save”, then press to
save the message in the Drafts box.
Note
• You can send it later following the instructions in
“Sending a Message in the Drafts Box” on page 100.