


40-
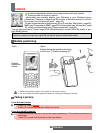
Camera
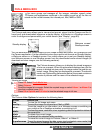
Adjusting your picture
You can adjust 4 types of settings before taking a picture: Resolution, Exposure, Brightness
and Zoom. These settings must be entered from the preview screen.
To select the picture size:
To select the exposure mode:
These modes allow you to optimise the picture quality according to the context.
To select the brightness:
To adjust the zoom:
Options menu
You can set default settings on the camera application. These parameters are then automati-
cally activated when entering the camera application:
Storing/erasing your picture
When a picture is captured (see above "Taking a picture", page 38), the ’Keep this photo ?’
message is displayed.
The image is automatically stored in the Fun & Media box Pictures sub-folder (see "Pictures",
page 42). It is stored as a .jpg file.
1 Use the left or right arrow keys to select the Large (VGA), Normal or Portrait mode.
2 Press OK or press on the side key to take your picture.
1 Press the up or down arrow key to access the exposure mode selection.
2 Use the left or right arrow to access the Standard, Sport (moving subject) or
Night (dark context) mode.
3 Press OK or press on the side key to take your picture.
1 Press the up or down arrow key to access the brightness setting mode.
2 Select one of the seven brightness levels.
3 Press OK or press on the side key to take your picture.
1 Use the up or down arrow key to access the zoom mode (the zoom is not
available from the Large VGA mode).
2 Use the left or right arrow key to zoom in or out: .
3 Press OK or press on the side key to take your picture.
1 Press OK. Select Camera.
2 Select Options then select Settings:
Image resolution Large (VGA: 640x480 pixels)
Normal (160x120 pixels)
Portrait (60x80 pixels)
Image quality High, Normal and Basic
Shutter sound 1, 2, 3 (= volume levels)
1. The Shutter sound is a ’Camera-like’ sound that is heard when a picture is captured.
2. You may not be able to deactivate the shutter sound option on your mobile.
1 Select Clear thenYes to erase it.