Printing in Windows 13
Customizing Your Print Settings
You can use advanced settings for color management, printing at higher resolutions,
and selecting a variety of special effects and layouts.
1. On the Main tab, click the Advanced button in the bottom right corner of the
window.
2. If you see a warning note, click Continue.
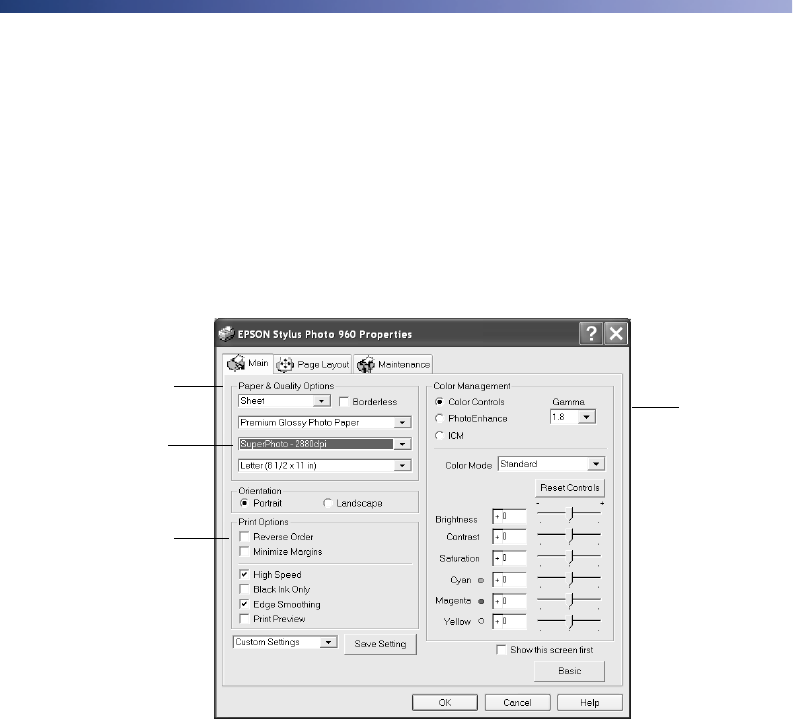
3. Select the following advanced settings as necessary:
Note: To manage color when you’re using Photoshop, see “Managing Color with
Custom Profiles” in your on-screen Reference Guide.
4. Once you have finished selecting advanced settings, you can:
■ Click OK to save your settings, return to the Print window, and print.
■ Click the Basic button to return to Basic settings.
■ Click the Page Layout tab and continue with step 5 to select layout settings.
Tip: You can save custom settings as a group so you can reuse them whenever
you print a similar project. For more information on advanced settings, click the
Help button.
Select Paper & Quality
options as necessary
Click here to select a
different print quality
for your paper type
Select Print Options as
necessary
Select a color
management
method
To choose
No Color
Adjustment,
click ICM first
sp960basics.book Page 13 Friday, January 17, 2003 2:39 PM


