38 Printing on Roll Paper, CDs, DVDs, and Card Stock
Adjusting the Cutting Position
Before you use the automatic roll paper cutter, you need to adjust the cutting
position. Make sure you have roll paper loaded before you start.
1. Windows: Right-click the printer icon on your taskbar (in the lower right
corner of your screen). Select Printer Settings. Then click the Maintenance
tab.
Macintosh OS 8.6 to 9.x: Open the File menu and choose Page Setup or Print.
Click the Utility button.
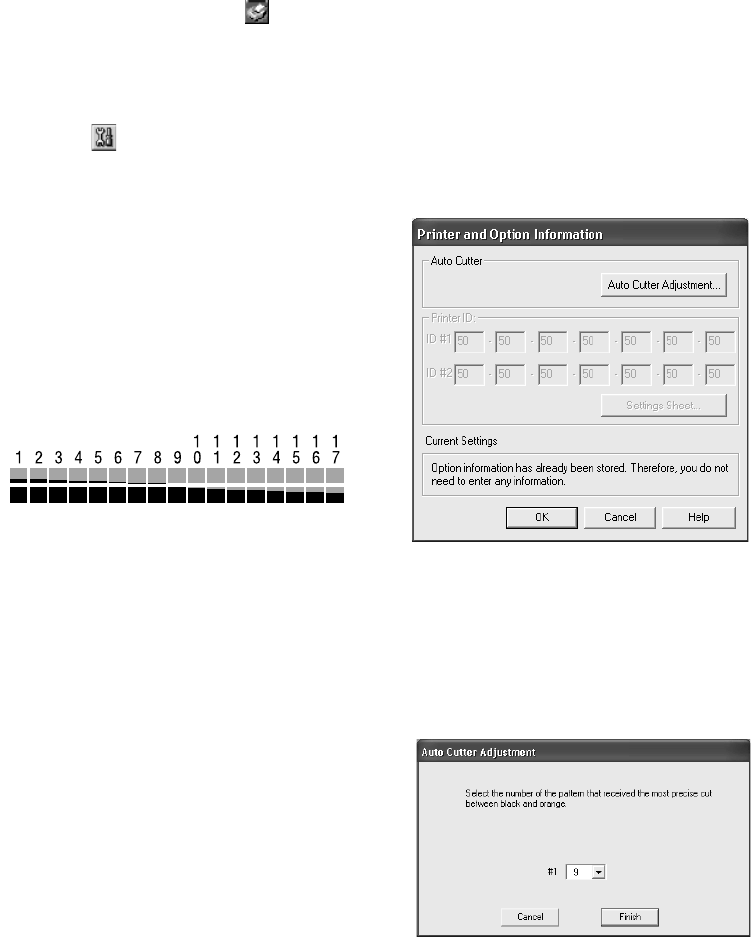
2. Click the Printer and Option Information or Printer Information icon.
You see a window like this:
3. Click the Auto Cutter Adjustment
button. You see an adjustment screen.
4. Click Print. The printer prints and cuts a
pattern like this:
5. Place the two cut pieces together and line
up the patterns. Identify the one with the
most precise cut between the yellow and
black boxes.
In the example shown, you would select
pattern #9.
6. Select that pattern number in the window
shown here and click
Finish.
7. Follow the instructions on page 39 to print
and cut your photos.
sp960basics.book Page 38 Friday, January 17, 2003 2:39 PM


