Printing on Roll Paper, CDs, DVDs, and Card Stock 39
Selecting Roll Paper Settings
Before you print on roll paper, make sure the paper is loaded correctly, as described
on page 34. If you want to cut your photos automatically, install the automatic roll
paper cutter and basket as described on page 36.
Then follow the steps in the next sections to select your roll paper settings on
Windows or Macintosh.
Note: You can’t print on roll paper when you’re using Mac OS X applications.
Windows
Start by opening your photo file and resizing it as necessary. Then follow these steps:
1. Open the File menu and click
Print. Then click Properties or
Preferences:
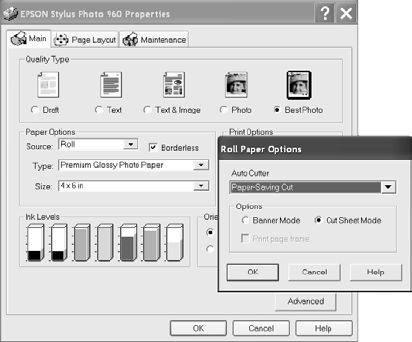
2. Choose Photo or Best Photo as
the Quality Type.
3. Choose Roll or Roll Paper as the
Paper Source. The Roll Paper
Options window pops up as
shown:
4. If you installed the cutter, select
one of the following Auto Cutter
settings:
■ For the cleanest edge, select Normal Cut.
■ To save paper, select Paper-Saving Cut. You may see a sliver of the previous
or next image on your photos.
■ To operate the cutter manually, select Manual Cut. This allows you to send
multiple print jobs without cutting between jobs.
5. Select
Cut Sheet Mode unless you’re printing a banner. Then click OK.
Note: If you’re using Film Factory with roll paper, select Roll Paper or Roll Paper
(No Margins) as the Paper setting. To select cutting and other roll paper options,
click Properties. Don’t change any other printer settings.
sp960basics.book Page 39 Friday, January 17, 2003 2:39 PM


