


Chapter 3 61
Utility Procedures
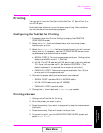
Printing
Chapter 3
Utility Procedures
Printing
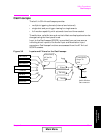
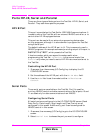
You can print from the Test Set via Parallel Port 15, Serial Port 9, or
the HP-IB port.
Note that data collection is not the same as printing. Data collection
can only be done from a software program.
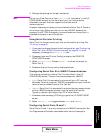
Configuring the Test Set for Printing
1. Press Shift, then Print (Printer Config) to display the PRINTER
CONFIGURE screen.
2. Select the Model field and choose the printer that most closely
matches your printer.
3. Select the Printer Port field and choose the port you will connect
the printer to. If necessary, use the I/O CONFIGURE screen to set
up addresses and communication modes.
a. SERIAL PORT 9: This is the uppermost serial port. Configuration
defaults are 9600, none, 8, 1, Xon/Xoff.
b. HP-IB: The HP-IB address (HP-IB Adrs) is set to printer address
701. Enter this number as 01. Set Mode to CONTROL. (The
default address 14 is reserved for an external controller.)
c. PARALLEL PORT: There are two ports available. Port 15 (the
printer port) is the uppermost port.
4. Connect the proper cable to the connector you selected.
• SERIAL PORT: standard NULL MODEM cable.
• HP-IB: HP-IB cable (such as HP 10833B)
• PARALLEL PORT: parallel cable
5. Change the FF (form feed) and Lines/Page as needed.
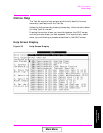
Printing a Screen
1. Configure the Test Set for Printing.
2. Go to the screen you want to print.
3. Press the
Hold key if you want to temporarily stop the measurement.
(Optional).
4. Press the
Print key. Data will be sent to the printer.
5. To cancel the print, go to the PRINTER CONFIGURE screen and
select Abort Print.
Main Menu