147
and emails, make phone calls, and get directions to your friends’
locations.
•More
: allows you to select the following additional options:
–
Clear Map
: after viewing or following directions, this option resets the
map.
–
Starred Items
: allows you to see locations you have marked as a
favorite such as restaurants, museums, parks, etc.
–
Labs
: this is a testing ground for experimental features that aren’t ready
for primetime. They may change, break or disappear at any time. Click
on a Lab to enable or disable it.
–
Help
: displays the Google Mobile Help web page where you can receive
help on Google Maps.
–
Terms, Privacy & Notices
: displays the Terms and Conditions, Privacy
Policy, o r Legal Notices information. Select the desired information from
the pop-up menu.
–
About
: displays general information about Google maps such as
Version, Platform, Locale, Total data sent, Total data received, Free
memory, etc.
Market
Android Market provides access to downloadable applications
and games to install on your phone. Android Market also allows
you to provide feedback and comments about an application, or
flag an application that might be incompatible with your phone.
Before using the Android Market you must have a Google
Account. For more information, refer to “Using Gmail” on
page 95.
1.
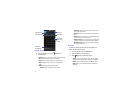
From the main Home screen, touch
Market
.
Note:
The main Home screen initially contains the
Market
icon. If you
delete it, or if you want to access Messaging from another Home
screen, you must touch
Applications
➔
Market
.
2.
Sign in to your Google account.
3.
The first time you sign in, the Android Market Terms of
Service will be displayed. Tap
Accept
to continue or
Decline
to exit.
4.
Tap
Apps
,
Games
, or
AT&T
to download or purchase games
or applications. You can also download updates to existing
applications.
5.
Follow on the on-screen instructions.
Note:
To use any downloaded market application that requires a USB
connection between your phone and your PC, you should first set the
USB setting to
Mass storage
. For more information, refer to “USB
Settings” on page 112.


