IES-1000 User’s Guide
16-4 SNMP
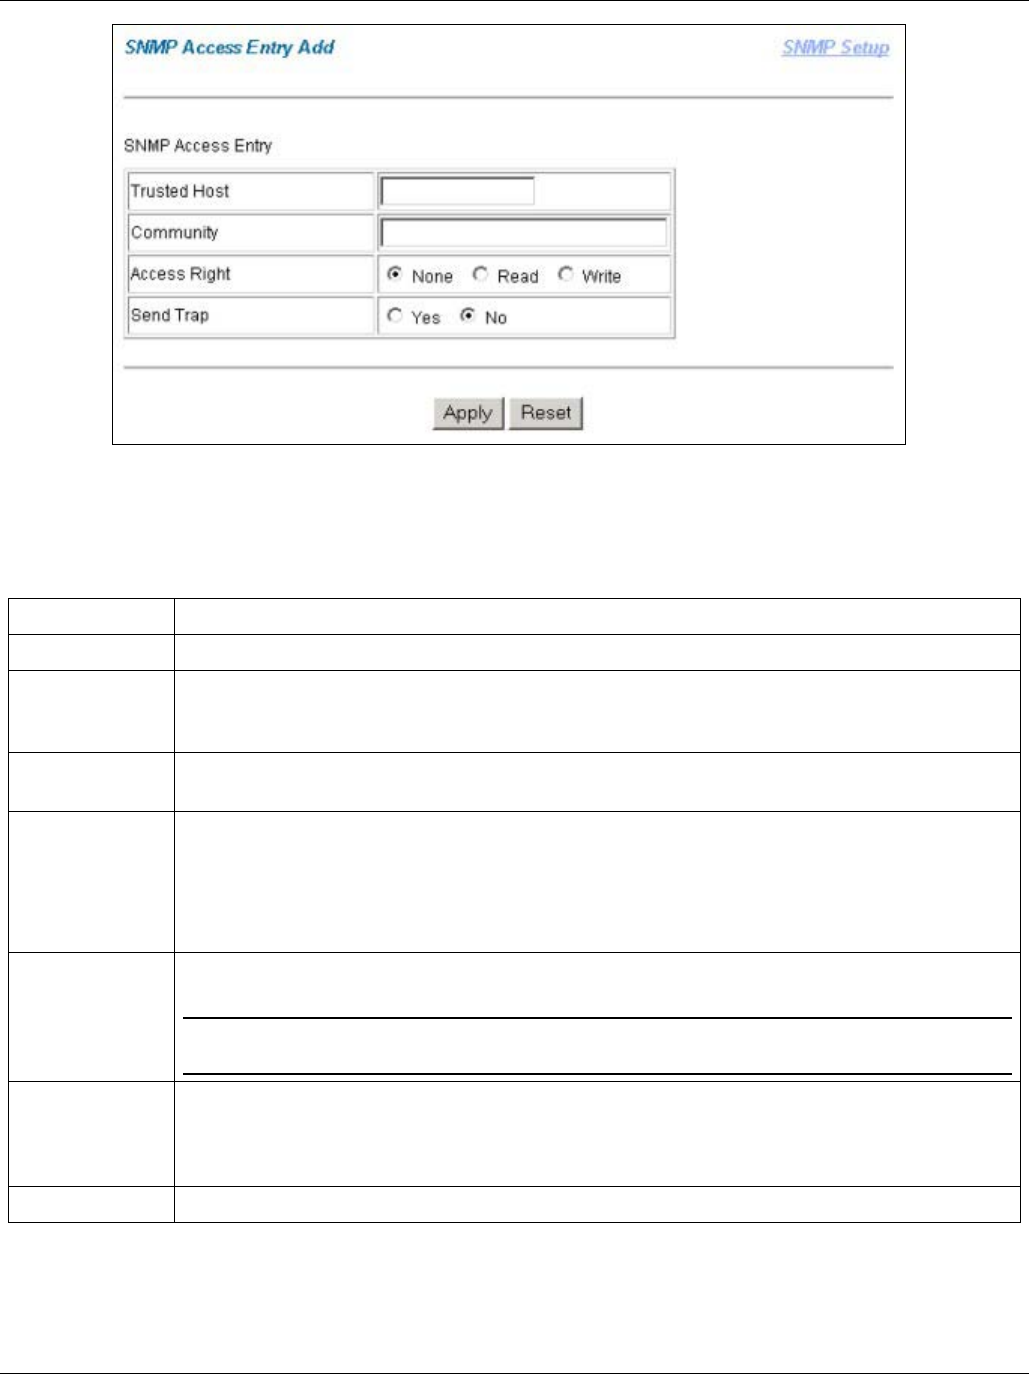
Figure 16-3 Add SNMP Access Entry
The following table describes this screen.
Table 16-3 Add SNMP Access Entry
LABEL DESCRIPTION
SNMP Setup Click this link to go to the SNMP Setup page.
Trusted Host If you enter a trusted host, your IES-1000 will only respond to SNMP messages from this
address. If you leave the field set to 0.0.0.0 (default), your IES-1000 will respond to all SNMP
messages it receives, regardless of source.
Community Enter the community, which is the password for the incoming requests from the management
station.
Access Right Select what access you want this SNMP access entry to allow from the management station.
Select None to not allow incoming Get and GetNext or Set requests.
Select Read to allow incoming Get, GetNext and Set requests.
Select Write to allow incoming Set requests.
Send Trap Select Yes to have the IES-1000 send traps to the SNMP manager. Select No to have the
IES-1000 not send traps to the SNMP manager.
Setting the Access Right field to None and the Send Trap field to No renders the
SNMP access entry invalid.
Apply Click Apply to save your changes back to the IES-1000's volatile memory. The IES-1000
loses these changes if it is turned off or loses power, so use the Config Save link in the
navigation panel on the left to save your changes to the non-volatile memory when you are
done configuring.
Reset Click Reset to begin configuring this page afresh.


