FOAMPRO® F1000
10
©2001 R11.01
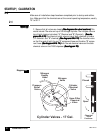
STARTUP | CALIBRATION
2.1
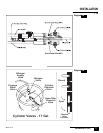
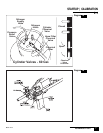
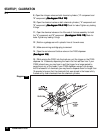
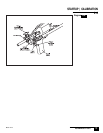
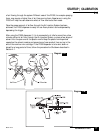
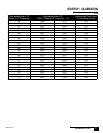
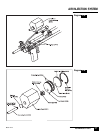
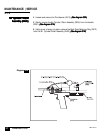
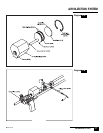
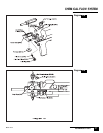
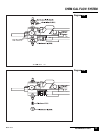
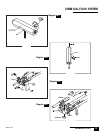
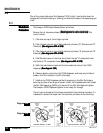
9 | Open the nitrogen valves on both chemical cylinders ( "A" component and
"B" component).
(See diagram 1(See diagram 1
(See diagram 1(See diagram 1
(See diagram 1
1A & 11A & 1
1A & 11A & 1
1A & 1
1B)1B)
1B)1B)
1B)
10 | Open the chemical valves on both chemical cylinders ( "A" component and
"B" component).
(See diagram 1(See diagram 1
(See diagram 1(See diagram 1
(See diagram 1
1A & 11A & 1
1A & 11A & 1
1A & 1
1B) 1B)
1B) 1B)
1B) Check for leaks. Tighten any leaking
fittings.
11 | Open the chemical valves on the filter end of the hose assembly for both
the "A" component and "B" component.
(See diagram 1(See diagram 1
(See diagram 1(See diagram 1
(See diagram 1
1A & 11A & 1
1A & 11A & 1
1A & 1
1B) 1B)
1B) 1B)
1B) Check for
leaks. Tighten any leaking fittings.
12 | Position a garbage can with a plastic liner at the work area.
13 | Make sure mixing cartridge plug is removed.
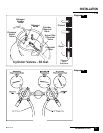
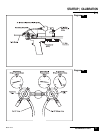
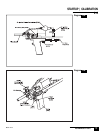
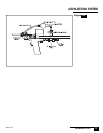
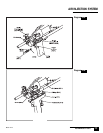
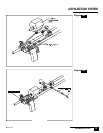
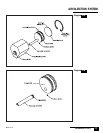
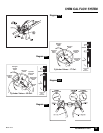
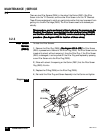
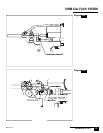
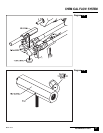
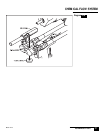
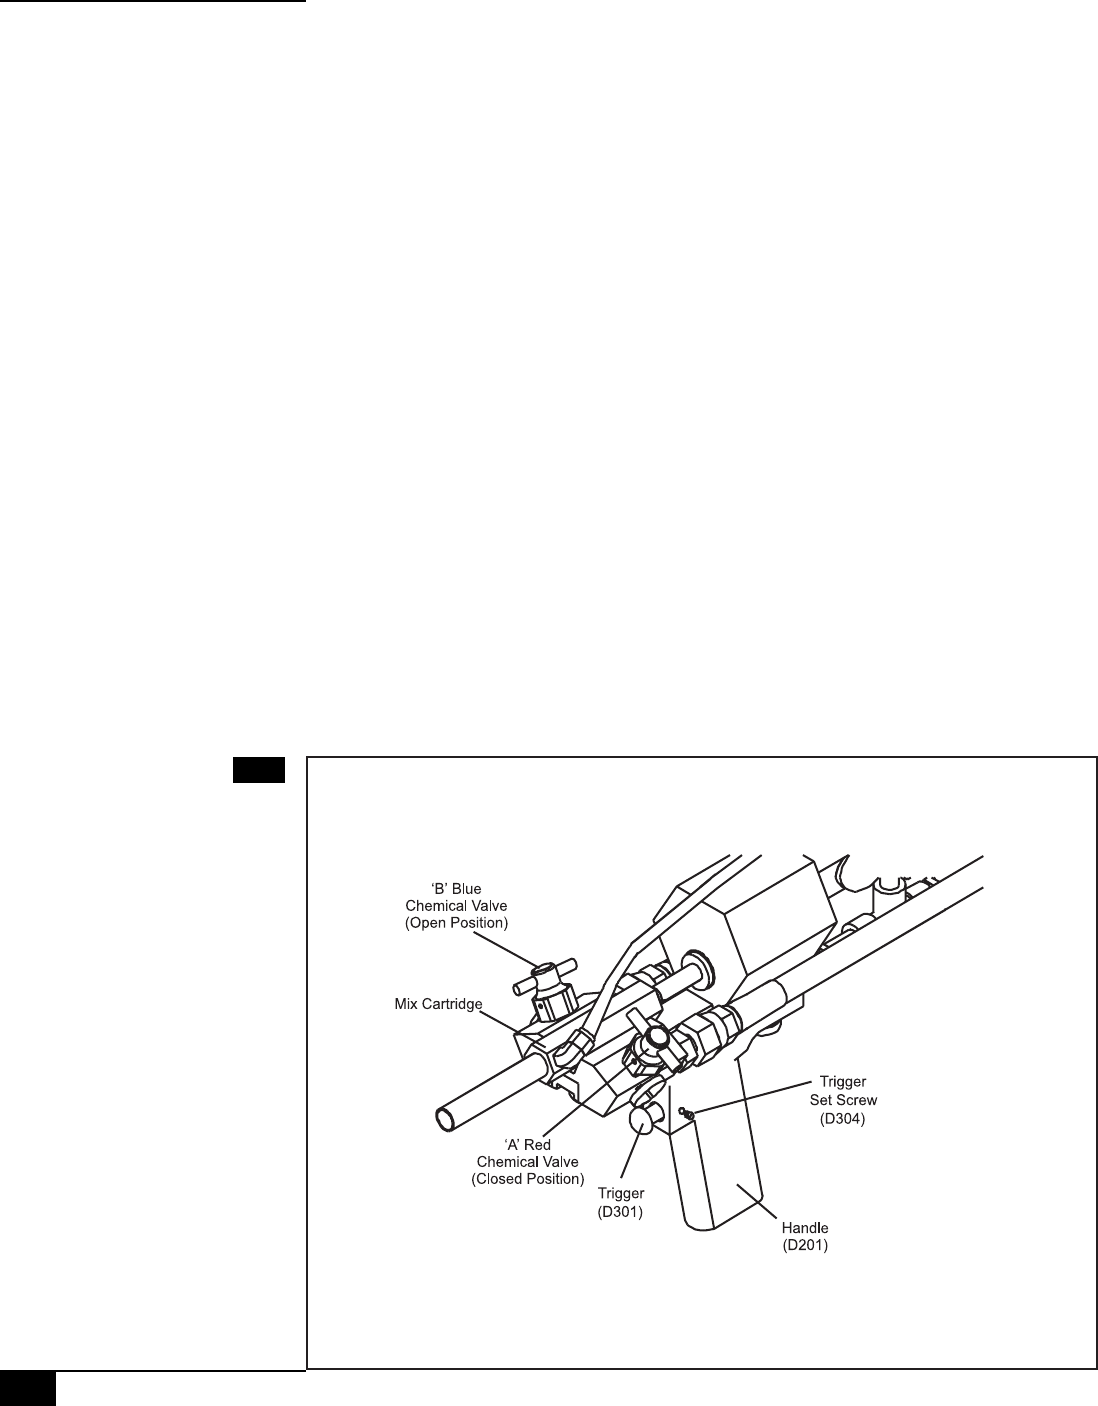
14 | Open the red valve and the blue valve on the F1000 dispenser.
(See diagram 1(See diagram 1
(See diagram 1(See diagram 1
(See diagram 1
0A)0A)
0A)0A)
0A)
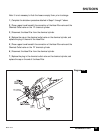
15 | While aiming the F1000 into the trash can, pull the trigger on the F1000
dispenser for 10 seconds, dispensing the foam into the trash can liner. If your
F1000 is brand new, you may have to pull the trigger for a longer period to
purge the air out of the hoses. If your F1000 dispenser was put into storage
with the hoses full of chemicals, you may have to dispense foam for longer than
10 seconds to be sure that the chemicals that were stored in the hoses is fully
flushed out by fresh chemicals from the chemical cylinders.
Diagram 10A