FOAMPRO® F1000
32
©2001 R11.01
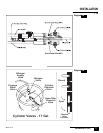
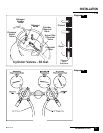
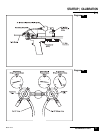
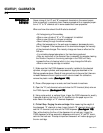
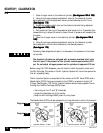
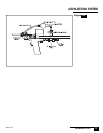
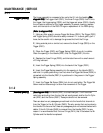
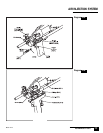
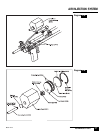
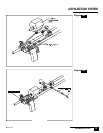
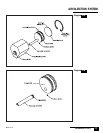
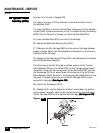
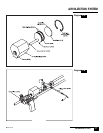
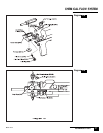
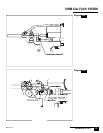
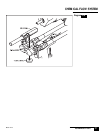
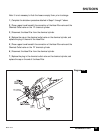
7 | Push the Connecting Rod (D405) back into the Air Cylinder Body (D401) as
far as it will go. This should cause the Back Plate (D410) to be pushed out of the
Air Cylinder Body (D401). The Piston (D402) should also be accessible at this
point.
(See diagram 33A)(See diagram 33A)
(See diagram 33A)(See diagram 33A)
(See diagram 33A)
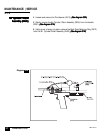
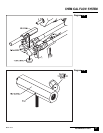
8 | Remove the Back Plate O Ring (D411) and replace it with a new O Ring.
Lubricate the new O Ring with a small amount of O Ring lubricant.
(See diagram 33A)(See diagram 33A)
(See diagram 33A)(See diagram 33A)
(See diagram 33A)
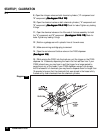
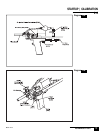
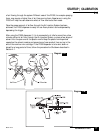
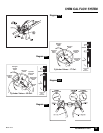
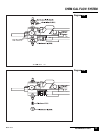
9 | Remove the Piston (D402) which will have the Connecting Rod (D405)
attached to it.
(See diagram 33A)(See diagram 33A)
(See diagram 33A)(See diagram 33A)
(See diagram 33A)
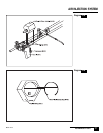
10 | Remove the two Piston O Rings (D404) and replace them with new O
Rings. Lubricate the O Rings with a small amount of O Ring lubricant.
(See diagram 33A)(See diagram 33A)
(See diagram 33A)(See diagram 33A)
(See diagram 33A)
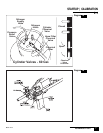
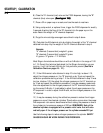
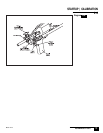
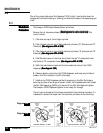
11 | If the Connecting Rod (D405) is not severely damaged or broken, do not
remove it from the Piston (D402) instead, skip to step12. If the Connecting Rod
(D405) needs to be replaced:
(See diagram 33B)(See diagram 33B)
(See diagram 33B)(See diagram 33B)
(See diagram 33B)
* Remove Set Screw (D403) in the side of the Piston (D402)
* Remove the Connecting Rod (D405) from the Piston (D402). This may
require using a hammer and a punch to push the Connecting Rod out.
* Place a new O Ring (D602) onto the notch in the new Connecting Rod
(D405) and lubricate the Ring with a small amount of O Ring lubricant.
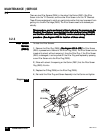
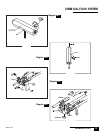
MAINTENANCE | SERVICE
3.1.3
Air Cylinder/ PistonAir Cylinder/ Piston
Air Cylinder/ PistonAir Cylinder/ Piston
Air Cylinder/ Piston
Assembly (D400)Assembly (D400)
Assembly (D400)Assembly (D400)
Assembly (D400)