FOAMPRO® F1000
50
©2001 R11.01
3.2
MAINTENANCE | SERVICE
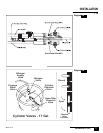
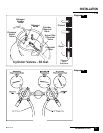
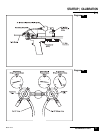
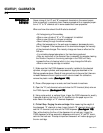
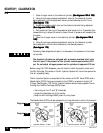
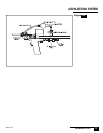
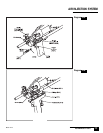
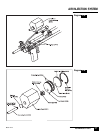
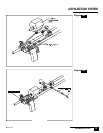
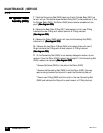
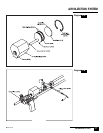
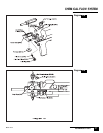
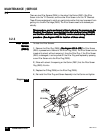
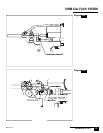
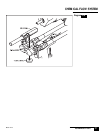
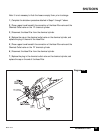
11 | Remove the two small O Rings (D602) on the Carrier (D501).
(See diagram 5(See diagram 5
(See diagram 5(See diagram 5
(See diagram 5
1A)1A)
1A)1A)
1A)
12 | Clean the surfaces of the Carrier (D501) where it comes into contact with
the Mix Cartridge.
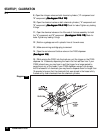
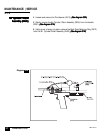
13 | Replace the two small O Rings (D602) on the Carrier (D501).
(See diagram 5(See diagram 5
(See diagram 5(See diagram 5
(See diagram 5
1A)1A)
1A)1A)
1A)
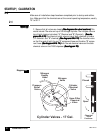
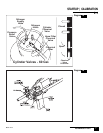
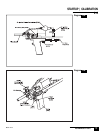
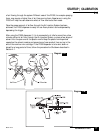
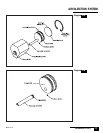
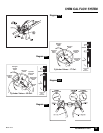
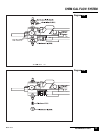
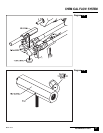
14 | Place the Mix Cartridge back onto the Carrier, and tighten it down using
the Thumbnut (D510), turn 1/4-turn past hand-tight.
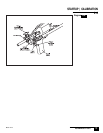
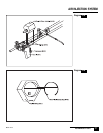
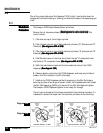
15 | Re-install the Air Cylinder/Piston Assembly as detailed in Steps 18 through
21 in the section “Air Cylinder/Piston Assembly Service Procedure”. You may
have to manually move the Connecting Rod (D405) so that it will be correctly
positioned to attach to the center rod in the Carrier (D501).
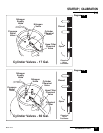
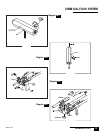
Mix CartridgeMix Cartridge
Mix CartridgeMix Cartridge
Mix Cartridge
Removal andRemoval and
Removal andRemoval and
Removal and
CleaningCleaning
CleaningCleaning
Cleaning
(D603 or Optional(D603 or Optional
(D603 or Optional(D603 or Optional
(D603 or Optional
Cartridge)Cartridge)
Cartridge)Cartridge)
Cartridge)
3.2.6 (cont.)