


Short messages
79
1999 Nokia Mobile Phones. All Rights Reserved.
If you want to add more recipients to the message, press Add recipient.
If you want to select the recipients from your SIM card, press the Menu
button, select SIM card memory, and choose the recipients.
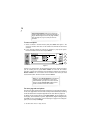
To send the message
1 If necessary, adjust the sending options for the current message by
pressing Send options. Press Change to set a new value for the current
message. The send options, Reply via same centre, Validity period, Message
centre in use, Message conversion and Request delivery report, are the
same as in the SMS settings, see ”SMS settings” on page 82.
2 Press Send. If your message is longer than 160 characters, it will be sent as
several short messages, provided that your network supports this feature.
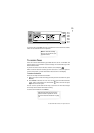
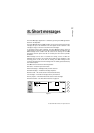
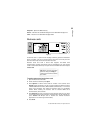
To receive messages
Short messages are received automatically, provided that this service is
available and that the phone is on and within network coverage. A received
short message can be a normal short message, business card or a service card.
All received short messages go to the Received messages folder.
When a new short message has arrived, a tone will sound – unless the device
is set to a silent profile – and an information note is shown on the display.
When you open a received message, the stamp on the right half of the
message is postmarked, and the time and date the message was sent are
shown below the sender’s name or number.
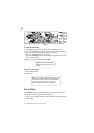
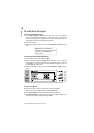
To read a message
There are two ways to read a received message:
1 When you receive a note informing you of a received short message, press
View to read the message. Or,
2 Press Cancel to dismiss the note. You can then open the Received
messages folder where unread received messages are marked with
Tip: If you press Clear both lists in the Recent
numbers view, all information in the lists is
removed. When you open one of the lists and
select a contact, Create card enables you to
create a contact card for the contact.
Tip: To send the message to several recipients,
use multiselection, see ”To select several
items” on page 33, or create a contact group,
see ”Contact groups” on page 55.