


Alternative Client Installation Method
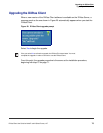
Upgrading the DiVitas Client
DiVitas Client User Guide for Nokia E and N Series Phones, v2.7
73
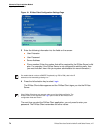
19 If a prompt appears asking you whether to clear the cache, press the left selection key
to select Yes or the right selection key to select No, depending on your preference.
20 If this is a new installation of the DiVitas Client, you will need to enter the DiVitas
Client configuration settings. Go to “Entering DiVitas Client Configuration Settings”. If
you are upgrading, you do not need to reconfigure the settings.
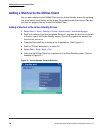
Entering DiVitas Client Configuration Settings
Before you can sign in to the DiVitas Server for the first time, you must configure user
settings. You will need to enter the following information. Ask your DiVitas Server
administrator for the values to enter. You also can ask your GSM service provider for your
mobile number.
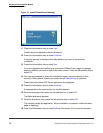
■ User Extension – Your DiVitas Client extension.
■ User Password – Your DiVitas Client password.
■ Server Address – IP address or FQDN of the DiVitas Server.
■ Phone number – Mobile (cellular) number of the handset.
To enter the user settings:
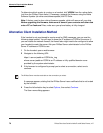
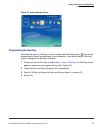
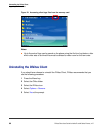
1 Start the DiVitas Client, if not already started.
2 Access the user settings screen:
If you are starting the DiVitas Client for the first time, the DiVitas Client configuration
settings screen is displayed automatically after you finish with the disclaimer and
notifications.
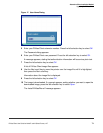
Otherwise, when the Enter password dialog is displayed, press the right selection key
to select Details.
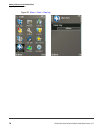
It is invalid to specify a DiVitas Client extension as the mobile number.