


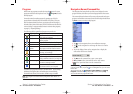
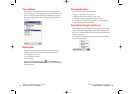

8. After power up is completed, use the stylus to tap on the Adminpull-up
menu at the bottom of the screen, and select
Activation Wizard. If your
device has not yet been activated, the Activation Wizard will
automatically start when you turn on the radio in your device.
9. Tap Nextthree times.
10
.On the fourth screen, you will be prompted for a lock code. Use the
keypad to enter the 6-digit lock code given to you by the Sprint
Customer Solution representative, then tap
Next.
11
.Enter the mobile phone number given to you by the Sprint Customer
Solution representative, then tap
Next.
12
.Tap Nexton the last screen, and the device will begin to initialize using
the data you have just entered.
Section 2: Understanding Your Device
2A: Your Device - The Basics 25
ᮣ
It is strongly recommended that you save the device’s memory data to
your computer or a storage card. The manufacturer is not responsible
for data changed or lost due to battery discharge. For back up, see
“Backing Up” on page 137.
Initial Setup
When using your device for the first time, completely charge the battery
then follow the initial setup procedures below:
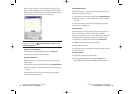
1. Press the Power button and when the welcome screen appears, tap the
screen with the stylus to start the setup process.
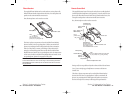
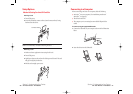
2. When the align screen appears, follow the directions for adjusting the
touch screen until the stylus screen appears.
ᮣ
If a finger or any other object touches the screen during a correction,
it will be cancelled. Repeat the correction procedure.
Note: To display the align screen after the initial setup process, press
the Record button while pressing the center of the navigation button, or
by tapping , Settings, System, and then Screen.
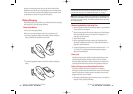
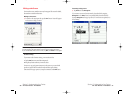
3. Read and understand how to use the stylus, then tap Next.
Note: See “Using the Stylus” on page 19 for more information.
4. Read and understand pop-up menu operation, then tap Next.
ᮣ
Read the on-screen explanation and then operate the screen.
Display the pop-up menus, and cut and paste the data according to
the screen instructions. When this stage is complete, tap
Next.
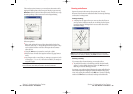
5. Follow the directions for setting the location, then tap Next.
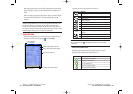
6. When the complete screen appears, initial setup is finished. After
tapping the screen, the Today screen will appear and the device will be
ready to use. See “Today Screen” on page 28 for more information.
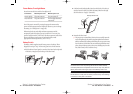
7. Slide the Radio Standby Switch on the left side of the device to the upper
side (ON) to activate the phone function.
Section 2: Understanding Your Device
24 2A: Your Device - The Basics
SPRINT~1-S2Aa.QXD 02.8.6 5:58 PM Page 24