


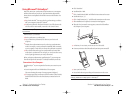
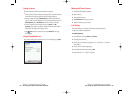
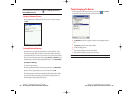

Creating an Appointment
If you are in Day or Week view, tap the desired date and time for the
appointment.
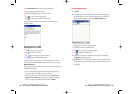
1. Tap New.
ᮣ
Tap to return to the calendar (the appointment is saved automatically).
ᮣ
Tap in the subject section to choose from predefined text.
ᮣ
Tap in the location section to choose from previously entered
locations.
ᮣ
Tap in the starts section to select a time.
ᮣ
Tap in the ends section to select a date.
ᮣ
Notes is a good place for maps and directions.
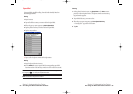
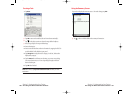
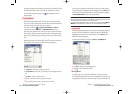
2. Enter a description and location.
3. Adjust date and time as needed.
4. Enter other desired information. Hide the input panel to view all
available fields.
5. Tap the Notestab to add notes or a drawing, or to create a recording.
For more information see “Notes: Capturing Thoughts and Ideas” later
in this chapter.
6. Tap OKwhen finished.
Section 2: Understanding Your Device
2H: Using the Microsoft Pocket Outlook 97
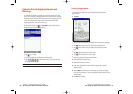
Calendar: Scheduling Appointments and
Meetings
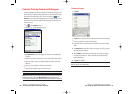
Use Calendar to schedule appointments, including meetings and other
events. You can check your appointments in one of several views (Agenda,
Day, Week, Month, and Year) and easily switch views by tapping one of the
5 view icons at the bottom of the screen or by pressing the Calendar
Program (button#1 on front of your device).
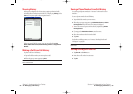
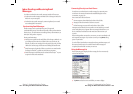
To access the Calendar, tap , then
Calendar. Or, press the Calendar
Program button on the front of the device.
ᮣ
Tap to go to today
ᮣ
Tap on the appointment to display or edit the details.
ᮣ
Tap to switch between the 5 views (Agenda, Day,
Week, Month and Year).
Note: Tap Optionson the Toolsmenu to customize the Calendar display.
Section 2: Understanding Your Device
96 2H: Using the Microsoft Pocket Outlook
SPRINT2H.QXD 02.8.7 2:46 PM Page 96