


Exchanging Messages 121
Note If Auto Setup is unsuccessful, select Internet e-mail from the Your
e-mail provider list on the next screen. You will also be asked to enter
e-mail server settings during the setup process. See “To specify e-mail
server settings” for details.
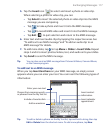
4. Enter your name. You can also edit the Account display name field to
specify the name of your ISP or e-mail provider. Tap Next
.
5. Enter your login name if it does not show automatically in the User
name field. Also enter your password, and select the Save password
check box. Tap Next
.
6. At this point, e-mail setup is complete. In the Automatic Send/
Receive list, choose how frequent you want e-mail messages to be
automatically sent and downloaded on your device.
Note Tap Review all download settings to select download options, set the
e-mail format as HTML or plain text, and more. For more information,
see “To customize download and format settings."
7. Tap Finish.
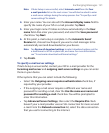
To specify e-mail server settings
If Auto Setup is unsuccessful, contact your ISP or e-mail provider for the
Incoming mail server
and outgoing mail server settings so you can enter
them on your device.
Other options that you can select include the following:
• Select the Outgoing server requires authentication check box, if
required by your provider.
• If the outgoing e-mail server requires a different user name and
password for sending e-mail, clear the Use the same user name and
password for sending e-mail check box. You will be prompted to
enter this information.
• Tap Advanced Server Settings, then select the Require SSL check
boxes if your e-mail provider uses an SSL connection for more secured
e-mail. From the Network connection list, select the data connection
that you use for connecting to the Internet.