Copyright © 2002 Nokia. All rights reserved.
Camera and Images
50
5. Camera and Images
Press Camera in
standby mode or go to
Menu→ Camera.
With the camera you can take pictures of people or events while on the move. The pictures
are automatically saved in the Images application, where you can rename them and
organise them in folders. You can also send photos to your friends in a multimedia
message, as an e-mail attachment, or via a Bluetooth or infrared connection. The camera
produces JPEG pictures.
Options before taking a
picture: Capture, Go to
Images, Settings, and Exit.
Glossary: JPEG is a standardised image compression format. JPEG files can be
viewed with the most common image viewers, image editors, and Internet browsers.
You can recognise these files by their JPG extension.
Taking pictures
Note: Obey all local laws governing the taking of pictures. Do not use this feature
illegally.
Note: Your phone must be switched on to use this function. Do not switch the
phone on when wireless phone use is prohibited or when it may cause interference
or danger.
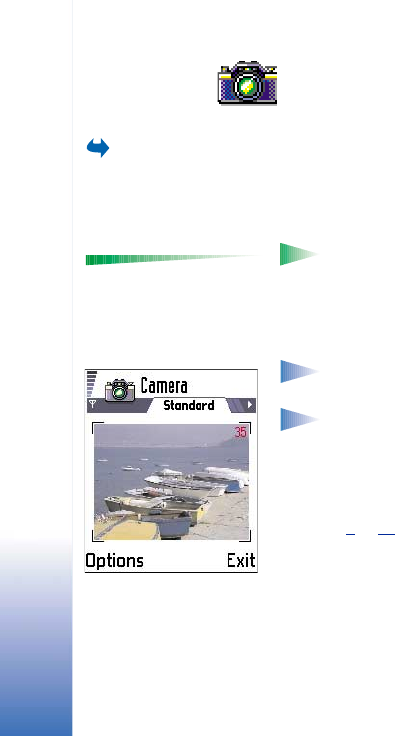
1 Open the sliding keypad and press Camera in standby mode. The Camera application
opens and you can see the view to be captured.
In Fig. 1
, p. 50, you can see the viewfinder and the cropping lines, which show you the
image area to be captured. You can also see the image counter, which shows you how
many images, depending on the selected image quality, fit in the memory of your
phone. The lens range is from 30 centimetres to infinity. If you take a picture and the
distance to the subject is closer than 30 centimetres it may affect the sharpness of your
image.
2 To take a picture, press the joystick.
Fig. 1 Finding a view to
capture.
