22
Basic Operation
Navigate Route
The ‘Navigate Route’ option allows you to easily select a route from a list. Refer to the ‘Navigating in
Marine Mode” section previously found in this manual. Also refer to the “Using Routes” section.
Navigate Track ( TracBack Navigation)
The TracBack function allows you to retrace your path using the track log automatically stored in the
receiver’s memory, which eliminates the need to store waypoints along the way. Refer to the ‘Navigating
in Marine Mode” section previously found in this manual. Also refer to the “Track Tab” section for more
information on setting up the Track options and saved tracks.
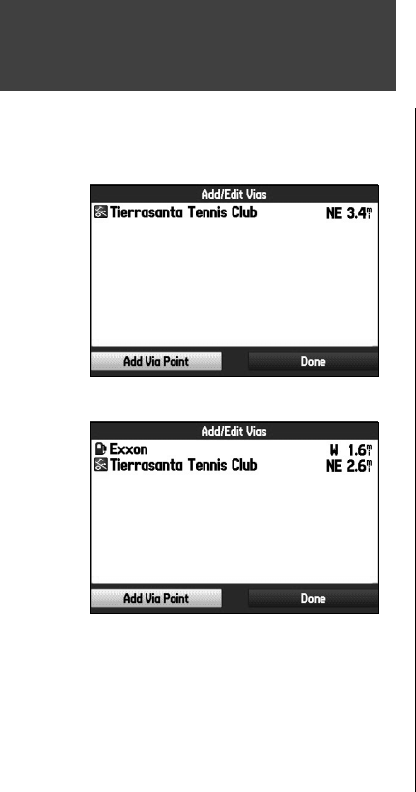
Edit Vias
You can add via points (points through which you would like to travel) to your route using the ‘Edit
Vias’ option. Via points are great for adding a stop at the gas station or bank to your route. They are
really helpful when planning a long trip.
To add via points to your route:
1. While navigating your route, press the NAV/MOB key. The Navigate menu opens.
2. Use the
ARROW KEYPAD to select ‘Edit Vias’ and press ENTER/MARK.
3. From the pop-up window, highlight either ‘Use Map’ or ‘Find’ and press
ENTER/MARK.
4. If you selected ‘Use Map’, use the
ARROW KEYPAD to select the desired item on the map and press
ENTER/MARK.
If you selected ‘Find’, select an item from the Find Menu as discussed in the “Finding an Item” section
found previously in this manual. Remember you can press the
MENU key while the Find Menu is
open to fi nd an item near another location, such as the destination.
5. The new point is added to the route as displayed in the Add/Edit Vias Page. Continue steps 2 through
4 until you have added all of the vias that you want. Highlight ‘Done’ and press
ENTER/MARK to
apply the new vias to the route.
Navigating in Automotive
Mode
Add/Edit Vias Page
Add/Edit Vias Page
showing a via point before the destination
190-00335-00_0A.indd 22 4/7/2004, 1:50:22 PM


