


58 Provisioning the system
Configuring CHAP
For iSCSI, you can use Challenge-Handshake Authentication Protocol (CHAP) to perform authentication
between the initiator and target of a login request.
To perform this identification, a database of CHAP entries must exist on each device. Each CHAP entry can
specify one name-secret pair to authenticate the initiator only (one-way CHAP) or two pairs to authenticate
both the initiator and the target (mutual CHAP). For a login request from an iSCSI host to a storage system,
the host is the initiator and the storage system is the target.
To enable or disable CHAP for all iSCSI hosts, see Changing host interface settings on page 37.
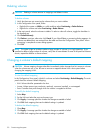
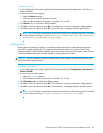
To add or modify a CHAP entry
1. In the Configuration View panel, right-click Hosts or a specific host and then select Provisioning >
Configure CHAP. If any CHAP entries exist, a table shows them by node name.
2. Optionally, select an entry whose name you want to change to create a new entry. The entry's values
appear in the option fields.
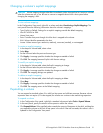
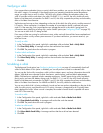
3. Set the options:
• Node Name (IQN). The initiator's IQN.
• Secret. The secret that the target uses to authenticate the initiator. The secret is case sensitive and
can include 12–16 bytes.
• Name, if mutual CHAP. Optional; for mutual CHAP only. Specifies the target name, which is
typically the target's IQN. The name is case sensitive, can include a maximum of 223 bytes, and
must differ from the initiator name. Storage system port IQNs are shown on the Enclosure Overview
panel (page 75).
• Secret, if mutual CHAP. Optional; for mutual CHAP only. Specifies the secret that the initiator uses to
authenticate the target. The secret is case sensitive, can include 12–16 bytes, and must differ from
the initiator secret. A storage system's secret is shared by both controllers.
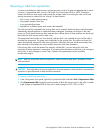
4. Click Add/Modify Entry. If the task succeeds, the new or modified entry appears in the CHAP entries
table.
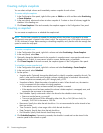
To delete a CHAP entry
1. In the Configuration View panel, right-click Hosts or a specific host and then select Provisioning >
Configure CHAP. If any CHAP entries exist, a table shows them by node name.
2. Select the entry to delete.
3. Click Delete Entry. If the task succeeds, the entry is removed from the CHAP entries table.
Deleting schedules
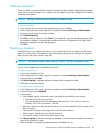
To delete task schedules
1. In the Configuration View panel, right-click the system or a volume or a snapshot and select
Provisioning > Delete Schedule.
2. In the main panel, select the schedule to remove.
3. Click Delete Schedule. A confirmation dialog appears.
4. Click Yes to continue; otherwise, click No. If you clicked Yes, a processing dialog appears. If the task
succeeds, the schedules are removed from the table and from the Configuration View panel. When
processing is complete a success dialog appears.
5. Click OK.