


107
– or –
From the Home screen, open the Widget tray and touch the
Photo Gallery
widget.
2. Touch the photo name that you want to save as a Picture ID.
3. Touch
Set as
➔
Set as pictore ID
.
4. Touch
Search Contact
(or use the scroll bar to quickly locate a contact.) and enter or select a contact to locate
the contact in which you apply this call image.
Once you select a contact name, the Caller Image automatically attaches.
– or –
Create a new contact. For more information, refer to “Creating a Contact” on page 52.
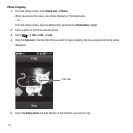
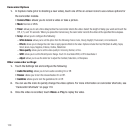
Editing a Photo
1. From the Home screen, touch Quick List ➔
Photos
.
When you access this menu, your phone displays the photos in Thumbnail view.
– or –
From the Home screen, open the Widget tray and touch the
Photo Gallery
widget.
2. Touch the photo name that you want to edit.
3. Touch ➔
Edit
➔
Edit
.
4. Touch one of the following options:
• Effect
: allows you to apply special effects to the selected photo such as: Filter, Style, Warp, or Partial Blur.
• Adjust
: allows you to adjust the Autolevel, Brightness, Contrast, or Color for this photo.
•Transform
: allows you to transform the selected photo. Select: Resize, Rotate, or Flip.
•Crop
: allows you to use the crop tool to crop this photo. Drag the drop tool in the direction that you want to begin cropping (the
box expands with sizing points displayed). Touch the sizing points and drag the box in the direction you want to crop. When you
have the area you want to crop outlined, touch Crop. For more information, refer to
“Photo Cropping”
on page 105.
•Insert
: allows you to insert Frames, Image, Clip Art, an Emoticon, or Text onto this photo.
•Memo on screen
: allows you to select a color and write a memo on the screen in the selected color on the screen.
5. Press the key and touch
Yes
at the
Save?
prompt.