


Exchanging Messages 85
7.4 E-mail
You can set up the following types of e-mail accounts on your device:
Outlook e-mail that you sync with your computer or the Exchange Server.
E-mail account that you have from an Internet Service Provider (ISP) or other e-mail provider.
Web-based e-mail accounts.
Custom domain e-mail accounts. The e-mail domain name is hosted by a different e-mail provider. For
more information, search for “custom domain e-mail” in the Help on your device.
Work account that you access using a VPN connection.
Synchronizing Outlook e-mail with your computer
If you have installed the synchronization software on your computer and created a partnership with your
device, then your device is ready to send and receive Outlook e-mail.
If you have not yet installed the synchronization software nor created a partnership, do so by following the
procedures in Chapter 5.
Tip To set up your company e-mail account so that you can access Outlook e-mail messages wirelessly, you must set
up your device to synchronize via an over-the-air connection with your company’s Exchange Server. For more
information about synchronizing with your company e-mail server, see Chapter 7.
Setting up an Internet e-mail account
Use Windows Mobile’s E-mail Setup Wizard to set up a POP3 or IMAP4 e-mail account on your device if you have
an e-mail account from an Internet service provider (ISP) or other e-mail service provider, or a web-based account.
You can also add a work account that you access using a VPN server connection as a POP3/IMAP4 account.
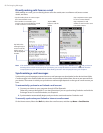
Note You can also set up an Internet e-mail account from the Home screen’s Mail tab using the simplified Mail Setup.
See “Mail” in Chapter 3 for details.
Tap Start > All Programs > E-mail > Setup E-mail.
Tap the e-mail provider, or tap Other if your e-mail provider is not on the list.
Enter your E-mail address and the Password for your e-mail account and select the Save password
option. Tap Next.
If e-mail provider settings are found preconfigured on your device, the E-mail Setup wizard shows a
successful message. Tap Next.
If the settings are not found on your device, select the Try to get e-mail settings automatically from
the Internet check box to find and download e-mail server settings from the Internet and then tap Next.
Note You may be charged when your device connects to the Internet and downloads the e-mail server settings.
5. Enter Your name and the Account display name and then tap Next.
Note If the E-mail Setup wizard was unsuccessful in finding and downloading settings from the Internet, select
Internet e-mail from the Your e-mail provider list on the next screen. You will be asked to enter e-mail
server settings. See “To specify e-mail server settings” for details.
6. In the Automatic Send/Receive list, choose how often you want e-mail messages to be automatically
sent and downloaded on your device.
Note Tap Review all download settings to select download options, set the e-mail format as HTML or plain text,
and more. For more information, see “To customize download and format settings."
7. Tap Finish.
To specify e-mail server settings
If Auto Setup is unsuccessful, contact your ISP or e-mail provider for the Incoming mail server and
Outgoing mail server settings so you can enter them on your device.
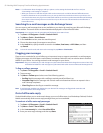
Other options that you can select include the following:
Select the Outgoing server requires authentication check box, if required by your provider.
If the outgoing e-mail server requires a different user name and password for sending e-mail, clear the
Use the same user name and password for sending e-mail check box. You will be prompted to enter
this information.
•
•
•
•
•
1.
2.
3.
4.
•
•