86 Internet
To check Wi-Fi network status
Aside from the Wi-Fi status icon on the title bar, you can check the current Wi-Fi connection status from any of
the following screens of your device:
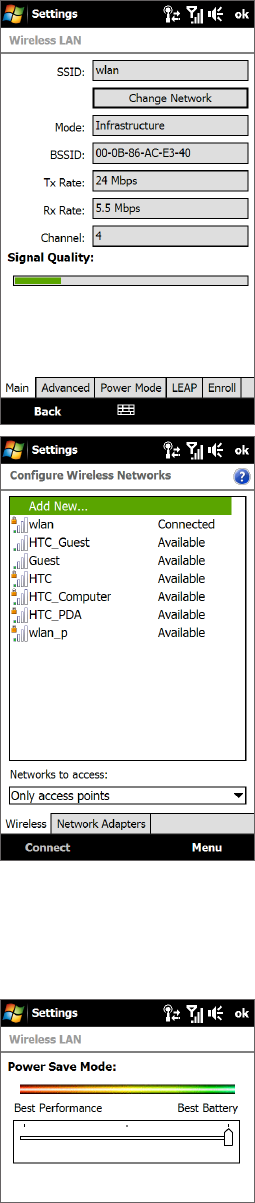
Wireless LAN screen
Tap Advanced on the Wi-Fi screen.
On the Main tab, you will see the Wi-Fi network that your device is
currently connected to. The configuration and signal quality of the
Wi-Fi network are also shown.
•
Configure Wireless Networks screen
Tap Start > Settings > All Settings > Connections tab > Wi-Fi and
then tap the Wireless Networks button. This screen displays all
available Wi-Fi networks in range.
To connect to a Wi-Fi network in the list, tap and hold on the desired
network, and then tap Connect.
Tap a Wi-Fi network in the list to view or change its connection
settings.
You can also add new Wi-Fi networks, if available, by tapping Add
New.
•
To save battery power while connected to a Wi-Fi network
Using Wi-Fi quickly consumes battery power. Turn off Wi-Fi when not in use. You can also enable power saving
settings while using Wi-Fi.
Tap Start > Settings, and then tap Menu > Wireless Networks > Power Mode tab.
Move the Power Save Mode slider to a position that optimizes
performance with the least power consumption.
For example, move the slider to the left (Best Performance) to have
the optimal wireless network performance; move to the right (Best
Battery) to obtain the maximum battery usage.
2.
1.


