


Installing the MDW 9030P Pocketphone
2-17
Setting the Control/Expansion DIP SwitchSetting the Control/Expansion DIP Switch
Setting the Control/Expansion DIP SwitchSetting the Control/Expansion DIP Switch
Setting the Control/Expansion DIP Switch
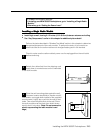
You must follow the instructions in this section if you are installing multiple carriers. Other-
wise, skip to “Installing a Single Carrier on a Shelf or Desk” or “Installing a Single Carrier on
a Wall.”
If you are installing multiple carriers, you must designate one carrier (the leftmost carrier)
as the control carrier and the remaining carriers as expansion carriers. The control carrier
acts as the “lead” carrier—its transmit and receive patterns control the expansion carriers,
ensuring that all of the linked carriers function as a single system.
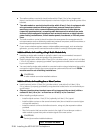
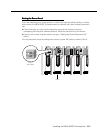
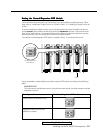
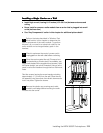
You set the control/expansion DIP switch, located in Slot 4, to configure the carrier:
Go to “Installing Multiple Carriers.”
Use a nonmetallic, pointed object to set each carrier’s DIP switch according to the following
table.
IMPORTANT:
Only one carrier (the leftmost carrier) can be the control carrier; the other carriers must be
expansion carriers.
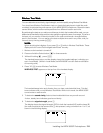
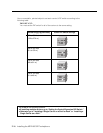
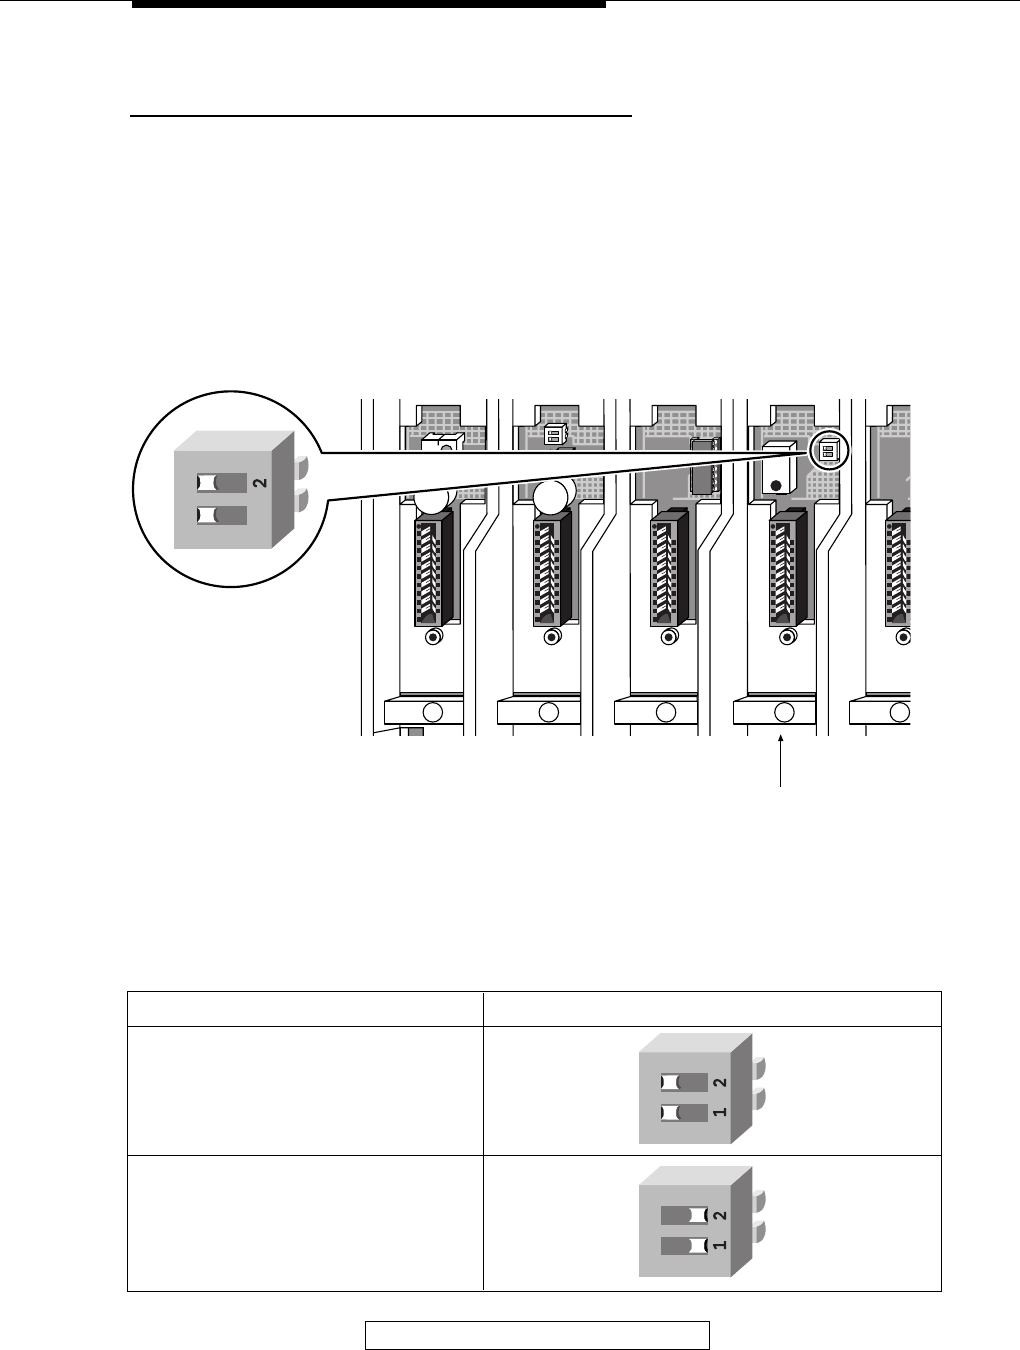
To designate the carrier as a...
Use this setting for the DIP switch...
control carrier (one carrier only)
expansion carrier (one or two
additional carriers)
O N O N
Control/Expansion
DIP Switch
Slot 4
1 2 3 4
21
O N
21
O N
5
1
O N