


116
Entertainment
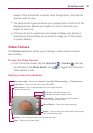
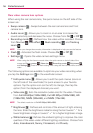
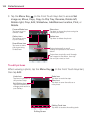
Rear video camera lens options
When using the rear camera lens, the quick menus on the left side of the
screen are:
• Swap camera
- Swaps between the rear camera lens and front
camera lens.
• Audio zoom
- Allows you to zoom in on an area to increase the
sound sensitivity and decrease the noise. Choose from On or Off .
• Recording mode
- Defines how the video will be recorded. Choose
from Normal , Live effect , Dual recording , and Tracking
zoom .
NOTE When you change these modes, information is displayed to help you use the feature.
• Flash - Activates the flash mode. Choose On or Off .
• Settings
- Opens the video camera settings menu.
NOTE When using the front lens to record video, the quick menus on the left side of the
screen are Swap camera
, Video size , Recording mode , Brightness ,
and Settings
. There is no flash setting when using the front camera lens to record
video.
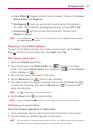
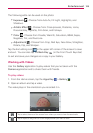
The following options are available to optimize your video recording when
you tap the Settings icon
on the viewfinder screen:
Edit quick menu
: Allows you to edit the quick menus (icons on
the left side of the viewfinder) for quick access to your favorite
options. Tap the option icon (on the left) to change, then tap the
option (from the displayed choices) you want.
Video size
: Sets the resolution (video size) for the video. Choose
from Full HD 60fps (1920x1080), Full HD 30fps (1920x1080), HD
(1280x720), MMS (320x240), and MMS (176x144).
NOTE The default resolution is Full HD 30fps(1920x1080).
Brightness : Defines and controls of the amount of light entering
the lens. Slide the brightness indicator along the bar toward “-” for a
lower brightness image or toward “+” for a higher brightness image.
White balance
: Defines the ambient lighting to improve the color
qualities of the video under different lighting conditions. Choose from
Auto, Incandescent, Sunny, Florescent, and Cloudy.