


106 Organizing Contacts, Appointments, Tasks, and Other Information
Organizing Contacts, Appointments, Tasks, and Other Information 107
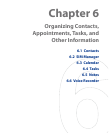
6.4 Tasks
Use Tasks to keep track of things you need to do. A task can occur once or
repeatedly (recurring). You can set reminders for your tasks and you can
organize them using categories.
Your tasks are displayed in a task list. Overdue tasks are displayed in red.
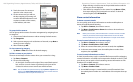
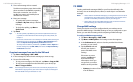
To create a task
1. Tap Start > Programs > Tasks.
2. Tap Menu > New Task, enter a subject for the task, and fill in
information such as start and due dates, priority, and so on.
3. Specify the type of category for your task, so that it can be grouped
with other related tasks. Tap Categories, then select a preset category
(Business, Holiday, Personal, or Seasonal), or tap New to create your
own category.
4. When finished, tap OK.
Tip You can easily create a short, to-do type task. Simply tap the Tap here to add
a new task box, enter a subject, and tap the Enter button on the onscreen
keyboard. If the task entry box is not available, tap Menu > Options and
select the Show Tasks entry bar check box.
To change the priority of a task
Before you can sort tasks by priority, you need to specify a priority level for
each task.
1. Tap Start > Programs > Tasks.
2. Tap the task you want to change the priority for.
3. Tap Edit, and in the Priority box, tap a priority level.
4. Tap OK to return to the task list.
Note All new tasks are assigned a Normal priority by default.
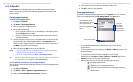
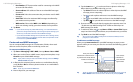
Send appointments
To send a meeting request
Use Calendar to schedule meetings via e-mail with contacts who use
Outlook or Outlook Mobile.
1. Tap Start > Calendar.
2. Schedule a new appointment, or open an existing one and
tap Menu > Edit.
3. Tap Attendees, then tap Add Required Attendee or Add Optional
Attendee and add the contacts whom you want to invite.
Note You can specify if an attendee is required or optional only if your
device is connected to a Microsoft Exchange 2007 server. Otherwise,
all attendees are designated as required. For more information, see
Chapter 8.
4. When you have finished adding attendees, tap Done.
5. Tap OK to send.
Tip To choose the e-mail account to use for sending meeting requests, tap
Menu > Tools > Options > Appointments tab. Tap the Send meeting
requests via box and choose to send via your Outlook E-mail, POP3/IMAP4
or Windows Live account.
Notes • If you’re sending the meeting request using your Outlook E-mail account,
it will be sent to the attendees the next time you synchronize your device
with your PC or Exchange Server.
• When attendees accept your meeting request, the meeting is
automatically added to their schedules. When their response is sent back
to you, your calendar is updated as well.
To send appointment details as a vCalendar
A vCalendar is a standard file format used for exchanging scheduling and
task information. vCalendar files can be exported to Outlook on the PC.
Tap Menu > Send as vCalendar to send a vCalendar containing
appointment details as a file attachment in an MMS message. For more
information, see “MMS” in Chapter 7.